

Clutter never arrives all at once. It builds one unopened box, one “maybe later” drawer, one chair that quietly turns into a clothes pile. You don’t need a full renovation to fix this. You need a clear system and a plan you’ll actually finish.
This guide by Homes Remedy team gives you exactly that. It’s a complete decluttering checklist built around 10 clear steps, backed by the specific techniques that make each step faster and easier. You’ll also get a room-by-room breakdown, a disposal plan, prevention habits, and answers to the questions people ask most about how to declutter a home properly. Read it once, then keep it open on your phone while you work.
Why Most Declutter Checklists Fail
Before the steps, here’s the real problem with most advice on how to declutter your home: it tells you what to do, but not how to decide. “Get rid of what you don’t need” sounds simple until you’re standing in front of a drawer, holding a random cable, wondering if you’ll need it in six months.
Every step below pairs a clear action with a fast decision rule. That combination is what actually moves you through a room instead of leaving you stuck holding one object for ten minutes.
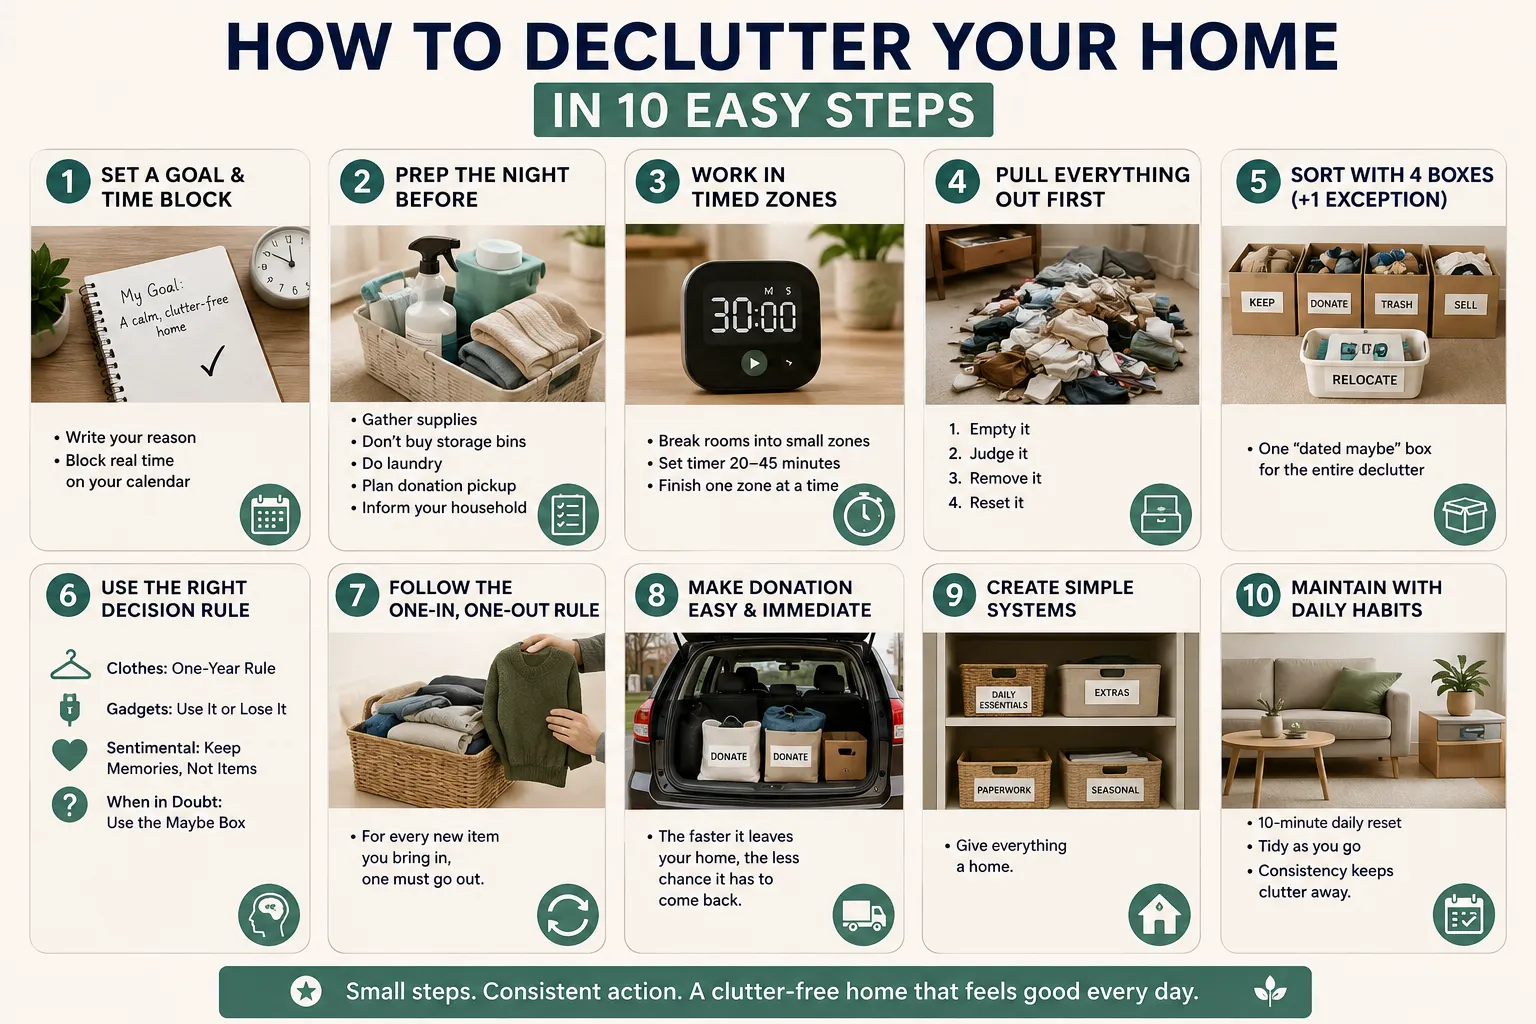
Step 1: Set a Goal and Put a Time Block on the Calendar
Grabbing random bags for donation feels productive, but it rarely lasts. Start with a real reason instead.
Ask yourself what a decluttered home actually gives you. Faster mornings. Empty counters. A drawer that closes without a fight. Write that reason down somewhere visible. When your energy dips halfway through a closet, that one sentence pulls you back in.
Then do the part most guides skip: book real time for it. Don’t leave decluttering as a vague weekend hope. Put a fixed block on your calendar, the same way you’d book a dentist appointment. A booked block beats good intentions almost every time, because it removes the daily choice of “should I start today?” The date is already decided.
Step 2: Prep the Night Before, Not the Morning Of
Skipping preparation costs you real time tomorrow. Spend 30 to 45 minutes tonight instead.
Gather supplies only. Trash bags, a few sturdy boxes, a marker, a laundry basket for stray items, a timer, and a cloth with a spray cleaner. Nothing else.
Don’t buy storage bins yet. This is the single most expensive mistake people make. Storage only makes sense once you can see the actual gaps left behind after you remove clutter. Buying bins first just gives your excess a tidier home instead of removing it.
Run any laundry that’s piling up. Clothes stuck in the wash won’t show up for your clothing sort tomorrow, and that throws off your whole sorting picture.
Warn your household. Nobody needs to help, but everyone needs to know the house will look messier before it looks better, and that nothing should get put back in the piles you’ve already sorted.
Book your exit route. Check your local donation center’s hours. Schedule a charity pickup if one’s available. If you’re clearing years of accumulated stuff, look into a bulk collection service. Do this tonight, and your sorted bags won’t sit in the hallway for a month.
Step 3: Work in Timed Zones, Never Whole Rooms
This is where most people go wrong when they search for how to declutter. They open every closet on day one and burn out by lunchtime.
Break every room into small, specific zones instead. A kitchen isn’t one project. It’s a pantry, a junk drawer, a spice rack, and a cabinet of mismatched mugs. A bedroom isn’t one project either. It’s a closet, a nightstand, and a dresser.
Pick one zone. Set a timer for 20 to 45 minutes, depending on the size. Finish that zone completely before you move to the next. This turns an overwhelming whole-house job into a series of small, completed wins, and it also stops you from leaving three half-finished piles across the house by evening.
A useful order to follow: start with trash, then move through the entryway, kitchen, bathrooms, and living spaces before tackling clothes, bedrooms, paper, and storage last. Easy, low-emotion zones come first. That builds your decision-making speed before you reach anything that carries feeling.
Step 4: Pull Everything Out Before You Sort Anything
Don’t sort items while they’re still sitting inside the drawer or cabinet. You’ll skim the surface and keep half the clutter by accident, simply because it’s easier to glance and move on than to make a real decision.
Take every single item out. Pile it on the bed, the floor, or a table. Yes, this creates a bigger mess for a few minutes, and that’s fine. An empty space forces you to make an actual decision about every item before it earns a spot back inside.
Use this simple four-step loop for every zone you tackle:
- Empty it. Take everything out, down to the last loose item.
- Judge it. Pick out only what you actually use and value.
- Remove it. Everything else leaves, by trash, donation, or sale.
- Reset it. Put the keepers back with space between groups, not crammed edge to edge.
That fourth step matters more than people expect. A shelf with breathing room around each item looks organized even without a single storage bin. A shelf crammed full looks cluttered no matter how neatly you arrange it.
Step 5: Sort With Four Boxes, Plus One Smart Exception
Use four containers for every zone: keep, donate, trash, and sell. Add a fifth, a laundry basket labeled relocate, for anything that clearly belongs in a different room. Without that basket, you’ll cross the house every time you find a stray sock in the kitchen. With it, you drop the item and keep working, then redistribute everything once at the end of the session.
Here’s the exception that saves most people from stalling out completely: skip an “undecided” pile. It quietly turns into permanent storage, and nothing ever leaves it. Instead, allow yourself exactly one dated maybe box for the entire declutter. When you truly can’t decide on an item, it goes in that single box. Seal it, write today’s date and a review date six months out, then store it out of sight. If you never open it by that date, donate the whole box without looking inside again. This one rule solves the guilt that stalls most people halfway through a declutter, because it turns an impossible decision into a simple, time-bound one.
Step 6: Use the Right Decision Rule for the Right Item
“Do I need this?” is a weak question. Almost anything could count as needed someday. Replace it with sharper, faster tools depending on what you’re holding.
The five-second rule, for kitchens, bathrooms, and drawers: hold the item, and give yourself five seconds to recall the last time you used it. Nothing comes to mind, it goes. This works fast on gadgets, cosmetics, cables, and stationery. Skip it for anything sentimental.
The 20/20 rule, for “just in case” items: if you could replace something for less than a set amount of money and in under 20 minutes, you don’t need to store it for a hypothetical future. This dissolves the most stubborn category in any home, spare cables, backup phone cases, a second can opener, a fourth screwdriver you never reach for.
The reverse pick, for anything that overwhelms you: instead of hunting for what to throw away, hunt for what to keep. When you search for things to remove, every item stays until you justify getting rid of it. When you search for things to keep, every item leaves unless you actively justify keeping it. Same pile, opposite starting point, and roughly half the decision time.
The replace test, for anything you’re on the fence about: would you buy this again today, at full price, if you saw it in a shop? If the honest answer is no, it’s already told you what to do.
Step 7: Pull Whole-House Categories Together, Especially Clothes
Some categories spread across every room instead of staying in one place. A shirt sits in your closet, another sits in the guest room, and a third sits in a laundry basket you forgot about weeks ago.
For categories like this, skip the room-by-room approach for a moment. Gather every item in that category into one single pile, no matter which room it came from. Bring every coat, every pair of shoes, every sweater, into one spot before you judge a single one.
This matters because taking items out of their usual location lets you see them completely differently. Fourteen near-identical black tops look perfectly reasonable when they’re spread across two rooms. Piled together on one bed, they make the decision for you. If the pile feels intimidating, subdivide it: tops, then bottoms, then shoes, then accessories. Finish one subcategory before opening the next.
Toys work the same way if you have kids. Sort by category across the whole house rather than room by room, since duplicates only become obvious once everything sits together.
Step 8: Handle Sentimental Items Last, in Their Own Quarantine
Photos, gifts, and inherited items carry emotional weight that clothes and kitchen tools simply don’t. Start your session with a box of old letters, and you’ll stall out before you even reach the kitchen.
Set sentimental items aside completely during your main declutter session. Put them in one clearly marked box and don’t open it yet. This isn’t avoidance, it’s arithmetic. Sentimental decisions run far slower than functional ones. A single shoebox of photographs can absorb an entire afternoon on its own. That box is exactly why so many decluttering attempts collapse partway through.
Book a separate, calmer session for that box later, ideally when you’re not also managing a kitchen full of half-sorted mugs. When you do sit down with it, keep the item that best represents the memory, and let a photo hold the rest. A single keepsake box with a size limit you set in advance works better than an entire closet full of “just in case” mementos.
Step 9: Clean, Then Give Every Item a Fixed Home
An empty drawer or shelf is the easiest surface in your house to clean. Wipe it down. Vacuum the corners. Dust the shelf. Do this before a single item goes back inside, not after.
This step matters more than it sounds. A clean, empty space feels like a genuine fresh start, and that feeling makes you far less likely to cram it full of random items again next month.
Once you know what’s staying, give every item a fixed spot. Keys go on a hook by the door. Mail gets sorted into one tray, not scattered across three counters. Frequently used items go at eye level and arm’s reach. Rarely used items take the awkward top shelf or back corner. When everything has a designated home, putting things away takes seconds instead of turning into another chore you keep avoiding.
Pair this with a simple prevention habit: one thing in, one thing out. Buy a new pair of shoes, and an old pair leaves the house the same week. If you want the balance to actually drop rather than stay flat, try one in, two out instead.
Step 10: Remove Everything the Same Day, Not Eventually
This step gets skipped more than any other, and skipping it undoes everything you just did. A donation bag sitting in your car trunk for six weeks is still clutter. It’s simply changed location.
Handle each item once. Sorted items go straight toward the door, not to the hallway, not to a spare room, not to the trunk of your car for “later.” The car is the classic trap: bags get loaded in, driven around for weeks, and eventually get rummaged through and half-unpacked before anyone reaches an actual donation center.
Load the car the same day you finish a zone. Drop off donations immediately, or list valuable pieces for sale within 48 hours while your motivation is still fresh. Take the trash out that same night. A decluttering checklist only works if the “gone” pile actually leaves the property.
Where things should actually go:
- Donate to charity stores or local reuse centers. Some organizations, like shelters or children’s services, want specific items and often collect from your door.
- Sell, but only with a hard deadline. List items the day after your declutter session, never during it, since preparing listings mid-session kills your momentum. Set a rule: whatever hasn’t sold in three weeks gets donated instead.
- Repair, but only in a quarantined box with a written date. If you haven’t fixed it within a month, donate it.
- Recycle electronics, batteries, and paint through proper facilities, kept in a separate bag from everything else.
One rule outranks all the others here: sort during your session, remove at the end of your session. Never both at once, and never “tomorrow.”
Room-by-Room Notes That Speed Things Up
Use these as quick reference points while you work through each space.
Entryway. Keep only in-season coats and shoes people actually wear weekly. Move off-season items to storage. Toss single gloves, broken umbrellas, and duplicate water bottles. Give each household member one hook and one basket.
Kitchen. Start with counters, since they deliver the biggest visible improvement per minute spent. Anything used fewer than five days a week loses its permanent spot on the counter. Work by category rather than by cabinet, so duplicates surface naturally: pans, then containers, then utensils, then mugs. Toss lidless containers and container-less lids without hesitation.
Bathrooms. Sort by product category rather than by cabinet: skincare, hair, medicine, shaving, travel sizes, cleaning supplies. Give each category about five minutes. Expired products and half-used items you never liked go straight in the trash. This stays the fastest room in the house, so use it as a confidence builder.
Living spaces. Clear every surface completely, then put back only what you deliberately chose. A cluttered coffee table often has too many small objects rather than genuinely too much furniture. A good rule: pick a few larger pieces that cover most of the surface, and stop at three or four items total.
Bedrooms. Make the bed first. It costs two minutes and instantly changes how the whole room reads while you work. Clear nightstands and dresser tops next. If clothes keep piling on a chair, address the root cause: add a shallow basket inside the closet for items that are worn but not dirty, so they never land on furniture in the first place.
Paper. Every sheet gets exactly one outcome: shred it, act on it now, or file it. Nothing goes back into a loose pile, and no “to be filed later” folder should exist. Keep four or five broad categories only, like home, work, health, and finance. Broad categories survive. Overly detailed ones collapse within weeks.
How to Keep Clutter From Coming Back
A single decluttering session feels great, but without new habits, clutter creeps back within months. Build these into your routine:
- The 30-day list. Write down anything non-essential you want to buy, along with the date. Don’t buy it until 30 days have passed. Most urges disappear on their own, and this stops clutter before it ever enters your home.
- One in, one out. Every new item replaces a similar one already in the house.
- A permanent donation bag. Keep one in a closet or laundry room at all times. When something stops working for you, it goes in immediately, not “eventually.”
- A nightly ten-minute reset. Clear counters and return stray items to their homes each evening. This small habit protects everything you just accomplished.
- Cap your storage space. More storage capacity quietly leads to more retained belongings. A fixed limit forces real decisions instead of just absorbing more stuff.
Common Mistakes That Undo a Good Declutter
- Cleaning before decluttering. You end up cleaning around items you’re about to remove, then cleaning the same spot again. Declutter first, then wipe surfaces as you put the keepers back.
- Opening every space at once. Pulling out every cabinet’s contents in the first hour creates a mess so large it stops you cold. Finish one zone before starting the next.
- Shopping for storage mid-session. A trip for bins costs hours and returns nothing useful. Work with what you already own until the session is finished.
- Starting with the hardest space. Closets and sentimental boxes feel like the obvious place to begin, but they’re slow and emotionally taxing. Build momentum with easier zones first.
- Working without a timer. Set one for every zone. When it rings, move on. Perfect never actually arrives, and half-finished rooms pile up fast.
- Staying quiet about it. Tell your household what’s happening. It costs one short conversation and saves you an argument later.
A Faster Version for a Single Room
Not every declutter needs to be a whole-house project. If you’re short on time, run the same system at a smaller scale:
- Ten minutes: trash only.
- Ten minutes: fill a basket with anything that belongs in another room. Don’t leave the space yet.
- Thirty to forty minutes: clear every surface and drawer using the four-step loop from Step 4.
- Fifteen minutes: return the keepers with space between groups.
- Five minutes: wipe surfaces down, then carry the bags straight outside.
This same structure doubles nicely as a monthly maintenance pass once your main declutter is behind you.
Frequently Asked Questions
How long does it take to declutter a whole house? It depends on the size of your home and how much you own. Working through this checklist in short, focused sessions, most people finish a full house within two to four weekends rather than one long, exhausting marathon.
What should I declutter first? Start with an easy, low-emotion zone like a junk drawer or bathroom cabinet. Quick, fast wins build the confidence and decision speed you’ll need before you reach harder spaces like closets or sentimental boxes.
How do I stop clutter from coming back after I’ve done all this work? Follow the one-in-one-out rule, give every item a fixed home, and remove donation piles the same week you fill them. These three habits do more long-term work than any storage bin ever will.
Can I really declutter without buying new storage containers? Yes, and you should hold off on buying anything until you’re finished. Storage capacity tends to attract more belongings, so buying bins before you’ve reduced your volume just repackages the same clutter in tidier boxes. Assess what you genuinely need only after the real gaps become visible.
What’s the fastest way to make a real difference in just a couple of hours? Pick the two or three zones you see most often, usually the entryway, kitchen counters, and living room surfaces. Give each one 30 to 45 minutes with a timer, running the trash sweep first across all of them before you sort anything else. A couple of hours spent on visible zones changes how a home feels more than a full day spent in a garage.
Start with just one drawer today. That single small win is often all it takes to keep the momentum going.