
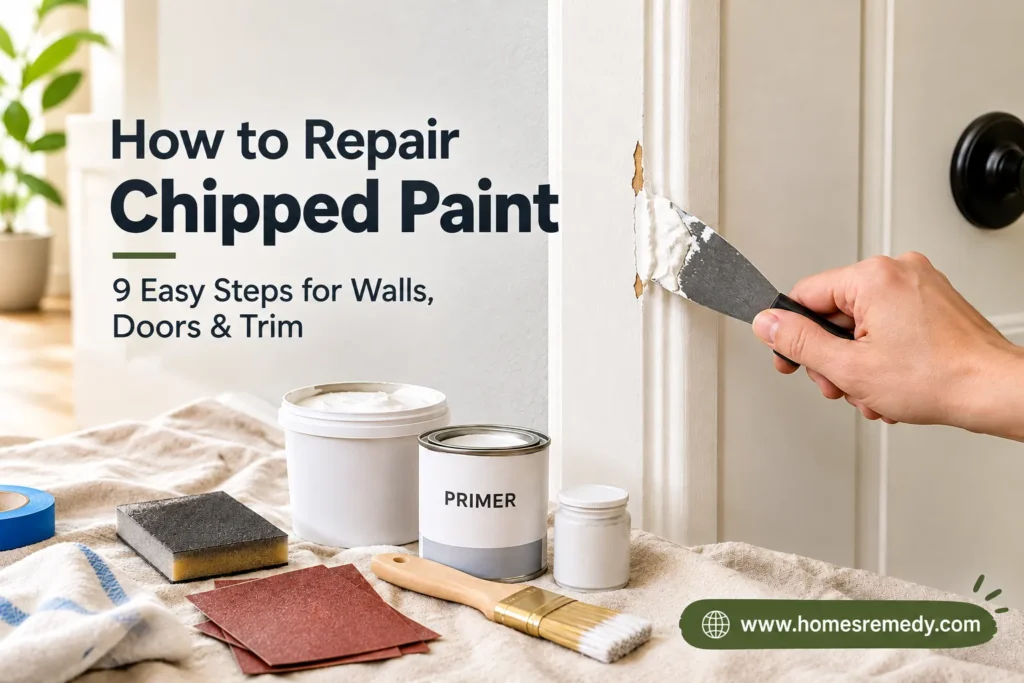
To repair chipped paint, scrape off loose paint, sand the chip’s edges smooth, fill the dent with paint filler, sand it flush, spot-prime it, and apply matching touch-up paint in thin, feathered coats. One small chip takes about 30 minutes of hands-on work plus drying time. The two steps most people skip, sanding the edges and priming the filler, decide whether anyone can see the repair.
| At a glance | Details |
|---|---|
| Difficulty | Beginner |
| Hands-on time | 20 to 40 minutes per chip |
| Total time with drying | 3 to 24 hours, based on filler and chip depth |
| DIY cost | About $25 to $50 for filler, sandpaper, primer, and a sample pot |
| Works on | Chipped walls, doors, trim, baseboards, window frames, metal doors |
Paint chips show up where daily life happens: the wall behind a chair, the edge of a door, the corner of a baseboard the vacuum keeps hitting. A dab of paint hides the color but not the dent. The chip’s hard edge still catches light, and the patch often looks worse than the damage.
This guide by Homes Remedy fixes that. You’ll learn how to tell a simple chip from a bigger problem, which paint filler and primer to use on each surface, how to match both color and sheen, and how to blend touch-up paint so it disappears. You’ll also find a troubleshooting table for repairs that go wrong.
Why Does Paint Chip?
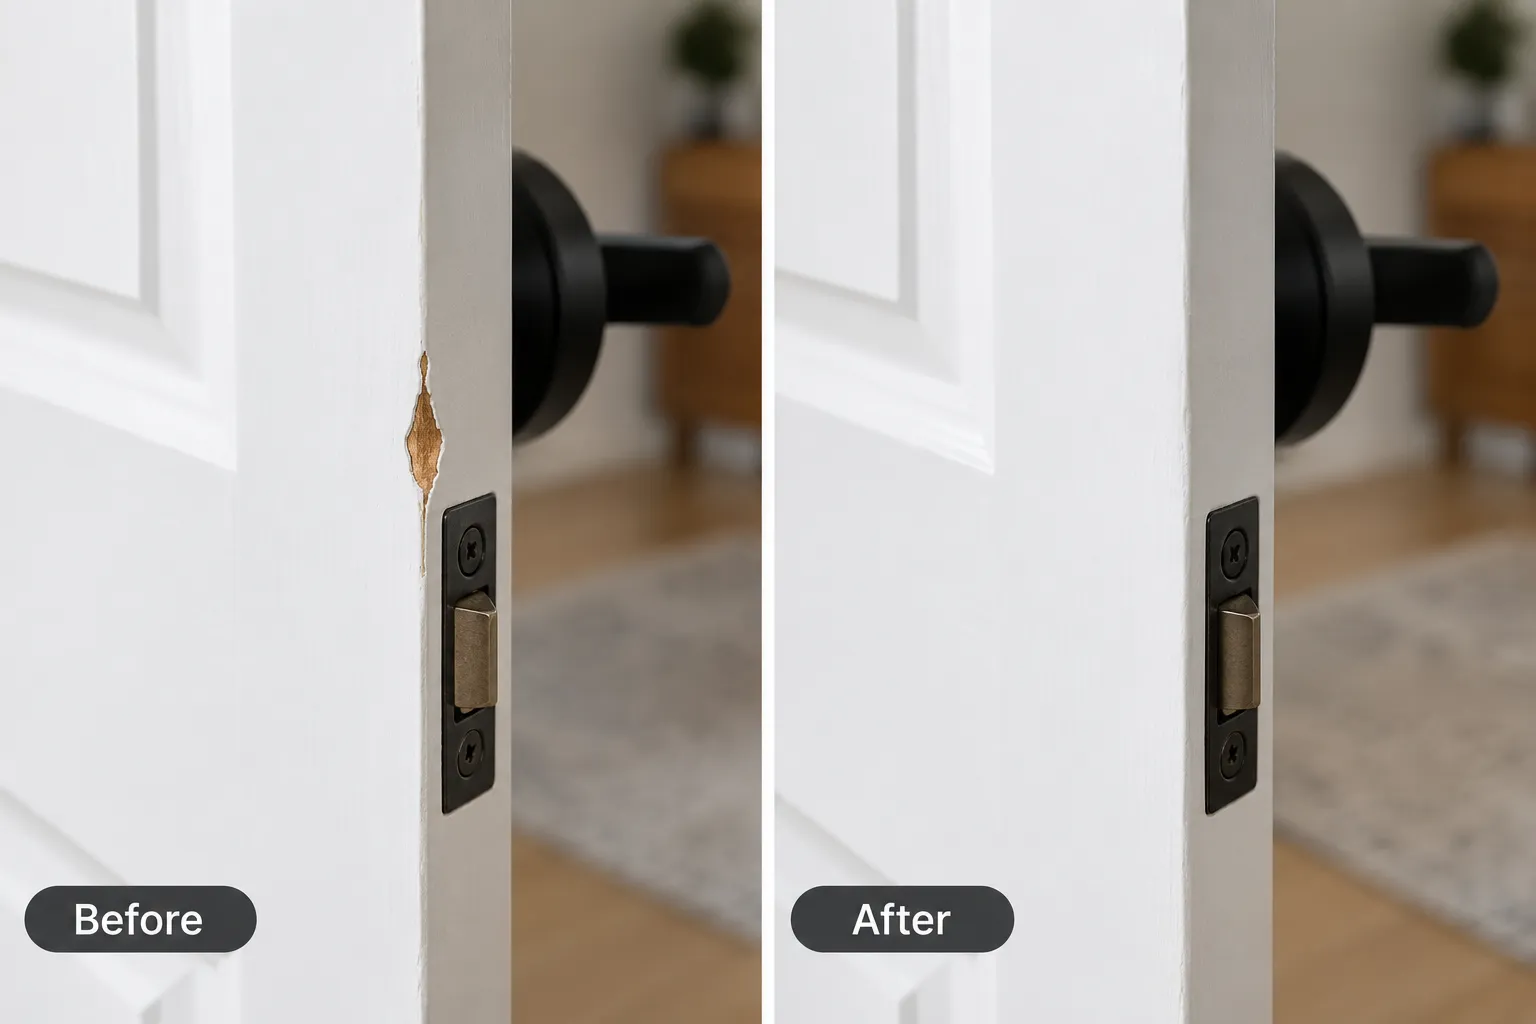
Paint chips when something breaks its grip on the surface. Sometimes a single hit causes it. Other times, the paint never had a strong grip in the first place, and a small bump simply exposes the weakness.
| Cause | What it looks like | Fix first |
|---|---|---|
| Impact (furniture, door handles, vacuums, toys) | One clean chip; paint around it holds firm | Nothing; go straight to the 9 steps |
| Door rubbing the frame | Chips along the door edge or the stop trim, often worse in humid months | Tighten hinge screws or plane the door edge |
| Dirt, grease, or hand oils under the paint | Chips near light switches, door handles, kitchen trim | Degrease before you paint |
| Skipped or wrong primer | Paint pops off in flakes that show bare surface | Use the right primer in Step 7 |
| Latex paint over oil-based paint | Paint peels off trim in strips when scratched | Use a bonding primer |
| Moisture from leaks or steam | Bubbles, stains, or soft, damp spots near the chip | Stop the leak and let the area dry |
| Old, brittle paint layers | Thick, crater-like chips in older homes | Test for lead, then fill and level |
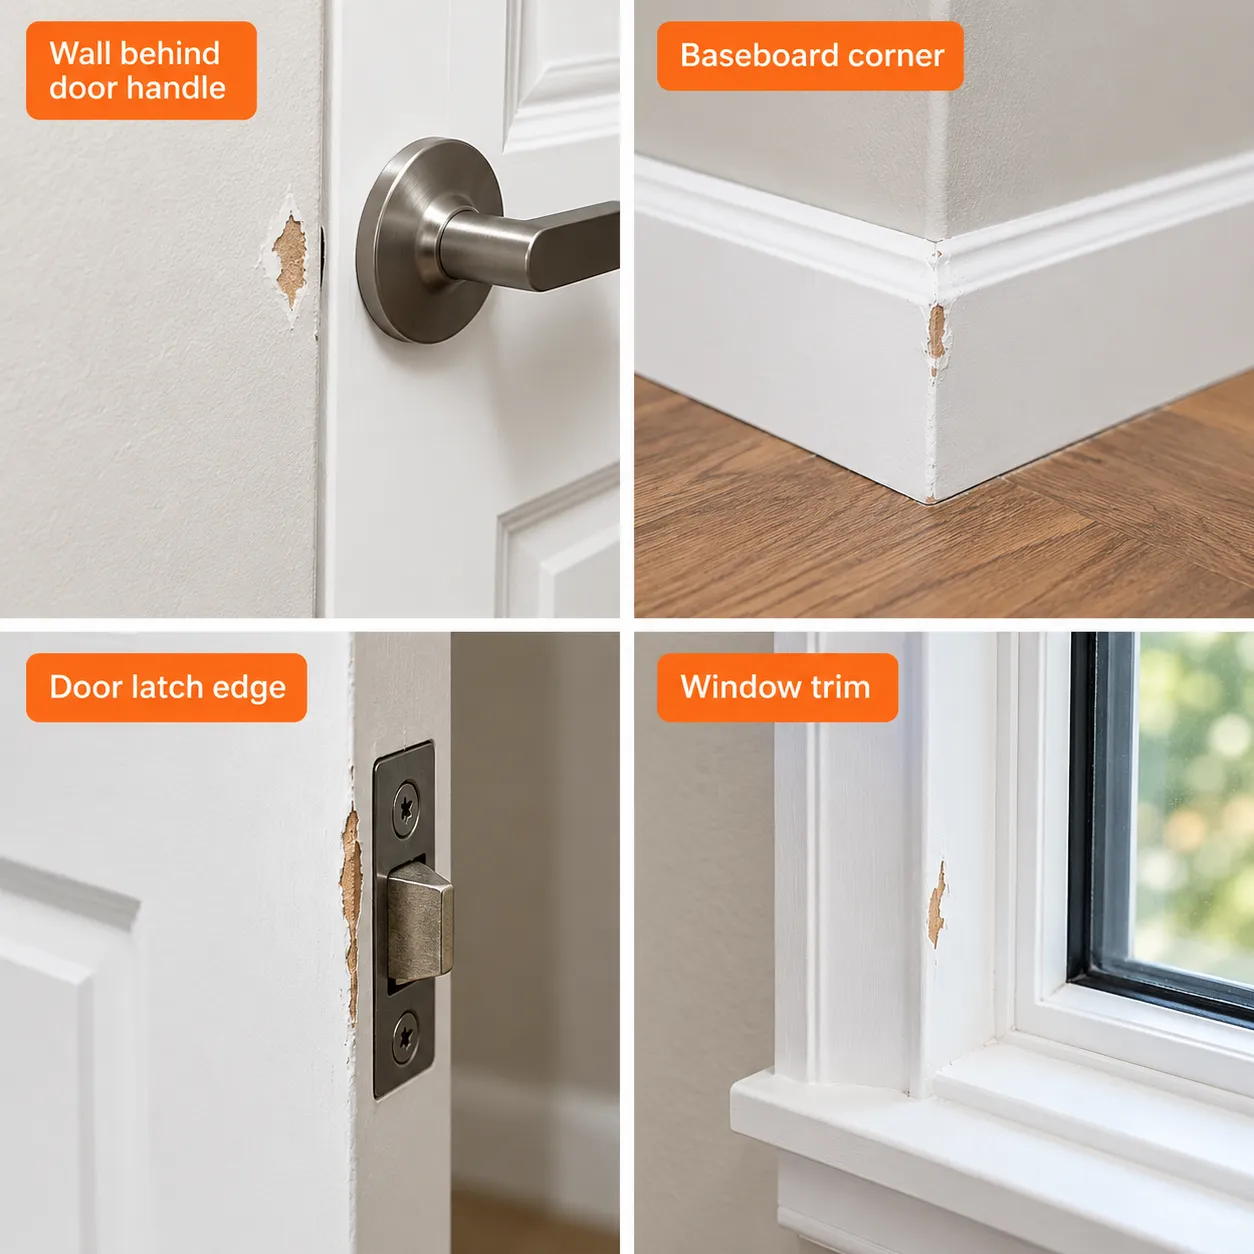
Chip or Peel? Know Before You Start
A chip is local damage. Peeling means the paint has lost its grip across a wider area. Use this quick test: press a strip of painter’s tape firmly next to the chip, then rip it off fast. If the tape pulls off more paint, you have an adhesion problem, not a simple chip. In that case, scrape back to firm paint and fix the cause before you patch. If the tape comes away clean, a spot repair will hold.
Tools and Materials
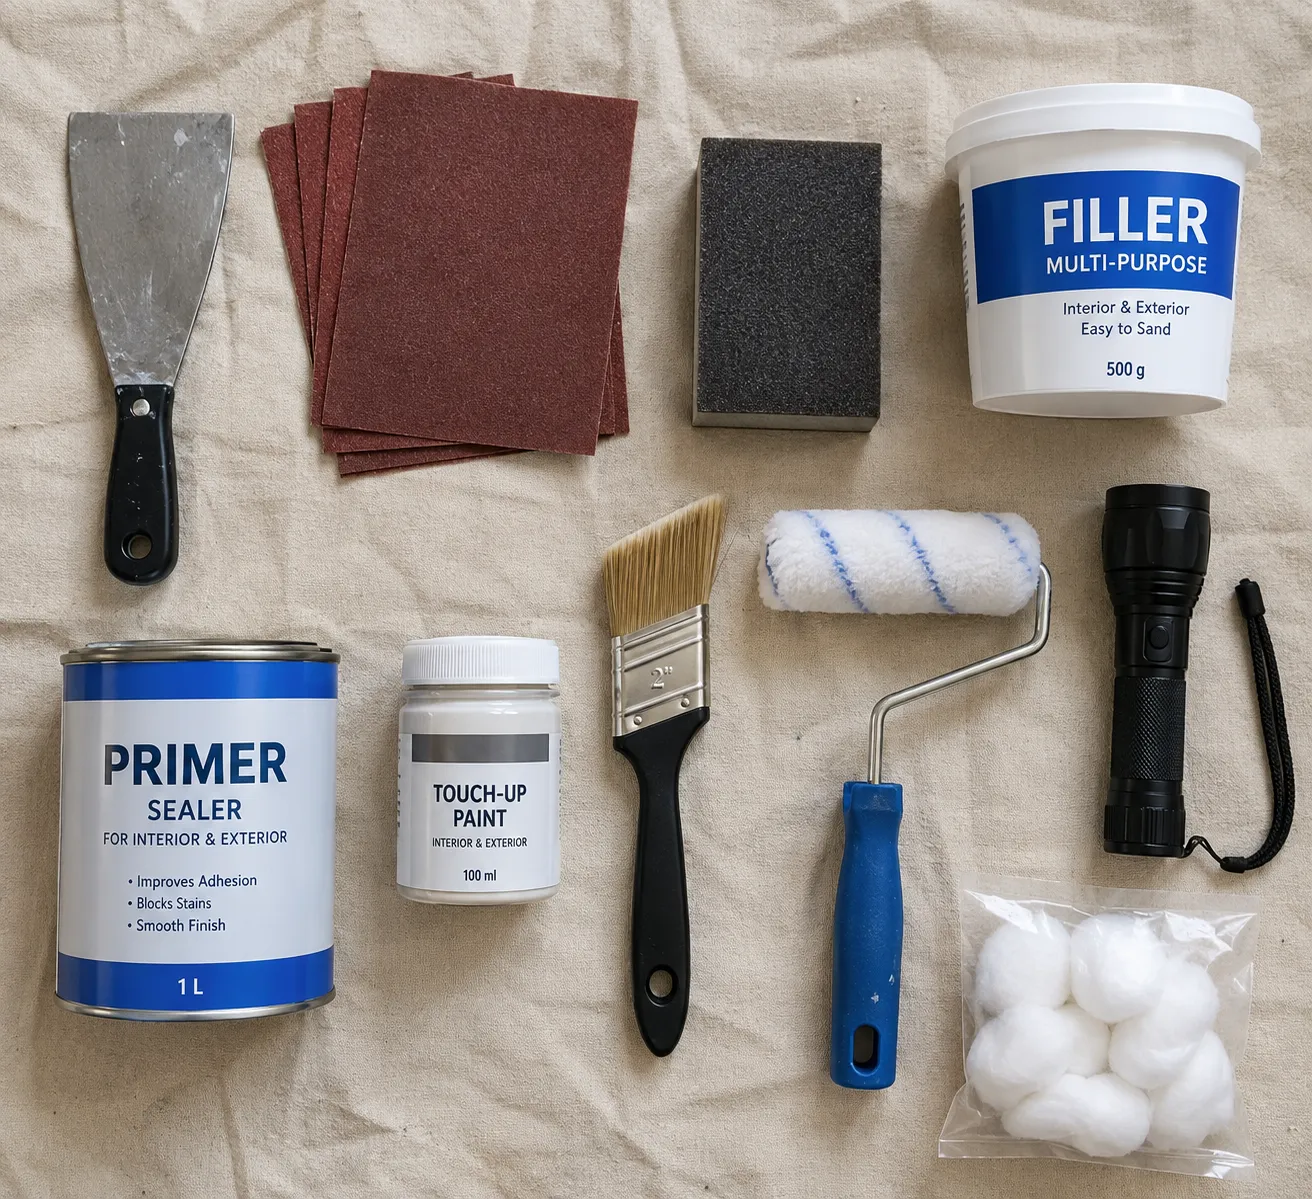
You need a scraper, sandpaper, the right paint filler, primer, and touch-up paint. Everything else keeps the job clean and safe.
| Item | Why you need it |
|---|---|
| Flexible putty knife (1 to 2 in.) | Lifts loose paint and spreads filler flat |
| Sandpaper: 120, 150, and 220 grit | Knocks down edges, then smooths the patch |
| Sanding sponge or small sanding block | Keeps the patch flat; bare fingers dig dips |
| Paint filler (see table below) | Rebuilds the missing surface |
| Primer | Seals the filler so paint dries evenly |
| Touch-up paint in the right color and sheen | Hides the repair |
| Small angled brush, foam brush, or 4-in. mini roller | Applies primer and paint |
| Painter’s tape and drop cloth | Protects floors, hinges, and glass |
| Mild dish soap, water, and a lint-free cloth | Removes dust, grease, and hand oils |
| Flashlight | Shows every bump when you hold it low |
| Rubbing alcohol and a cotton ball | Tests for latex vs. oil-based paint |
| Dust mask and safety glasses | Protect your lungs and eyes |
| Lead test kit (older homes) | Checks old paint before you sand |
Which Paint Filler Should You Use?
The right paint filler depends on the surface and how often it takes a hit. Soft fillers work well on walls but break out of door edges fast.
| Filler | Best for | Strength | Sands | Notes |
|---|---|---|---|---|
| Lightweight spackle | Shallow chips on interior drywall and plaster | Low | Very easy | Dries fast; shrinks little; interior only |
| Joint compound | Wide or textured wall areas | Low | Easy | Great for rebuilding texture |
| Acrylic latex exterior filler | Chips on exterior walls, siding, masonry | Medium | Medium | Flexes with heat and cold |
| Wood filler | Wood doors, trim, baseboards, window frames | Medium | Medium | Pick one labeled paintable |
| Two-part epoxy filler | High-traffic door edges, baseboard corners, sills | Very high | Harder | Mix only what you use in 5 to 10 minutes |
| Two-part body filler | Steel doors and metal trim | Very high | Harder | Remove rust first |
Safety First: Check for Lead Paint
If your home dates from before 1978, test the chip for lead before you scrape or sand. Builders used lead paint for decades, and many older homes outside the U.S. carry the same risk. Sanding lead paint releases fine dust that harms children and pets most.
- Test the chip with a lead test kit from a hardware store. Swab the edge so the test reaches the older layers.
- If the test shows lead, don’t dry-sand, dry-scrape, or use a heat gun. Hire a lead-certified painter.
- If the test comes back clear, still wear a dust mask and safety glasses.
- Keep kids and pets out of the room until you clean up all dust with a damp cloth.
How to Repair Chipped Paint in 9 Steps
Follow the steps in order. Do Step 8 while your filler dries in Step 5 to save time.
Step 1: Inspect the Damage and Test the Paint
Hold a flashlight flat against the surface so the beam skims across it. This low light throws shadows into every chip, ridge, and bump that normal room light hides. Mark each spot with a small piece of painter’s tape so you don’t miss one later.
Next, find out what paint you have. Dip a cotton ball in rubbing alcohol and rub a hidden spot for 10 seconds. If color comes off on the cotton, you have latex paint. If nothing comes off, you likely have oil-based paint. This matters most on doors and trim, because latex touch-up paint won’t grip oil-based paint without a bonding primer.
Finally, touch the surface under the chip. If it feels damp, soft, or powdery, stop. Find and fix the moisture source first, or your repair will fail within weeks.
Step 2: Prep the Work Area
Lay a drop cloth under the repair. Tape off nearby hinges, glass, and the edge of the next surface, such as the wall next to a door frame.
On doors, remove the knob, latch plate, and any hooks. For a big repair on a door face or edge, lift the door off its hinges and lay it flat across two sawhorses. A flat door keeps filler from slumping and paint from running.
Step 3: Remove Loose Paint
Hold your putty knife at a low angle, about 30 degrees, and slide it under the loose edges of the chip. Push gently until the knife meets paint that holds firm. Then stop. You want to remove only what wants to come off.
On drywall, watch for the brown paper face. If your knife tears that paper, seal the torn spot with a shellac-based or oil-based primer and let it dry before you add filler. Water-based filler on torn paper makes it swell and bubble. Brush away crumbs with a dry paintbrush. Skip wire brushes on drywall and soft wood, because they gouge the surface.
Step 4: Sand the Edges and Clean the Surface
This step makes the biggest difference, and most people skip it. A chip leaves a hard rim of old paint around the dent. Paint follows that rim, so it shows through every coat you add.
Fold a piece of 120- or 150-grit sandpaper and sand the rim until it tapers down to the bare spot. Finish with 220-grit. Close your eyes and run a fingertip across the edge. When you feel no step, move on.
Clean the area with a drop of dish soap in warm water, then wipe it again with plain water. Pay extra attention around door handles, light switches, and kitchen trim, where hand oils build up. Let the surface dry completely. Painters sum up good prep as clean, dull, and dry.
Step 5: Fill the Chip With Paint Filler
Choose your paint filler from the table above. Scoop a small amount onto your putty knife. Press it firmly into the chip, then drag the blade across the surface at a low angle to level it. Leave the filler slightly higher than the surface, because most fillers shrink as they dry.
For chips deeper than about 1/8 inch (3 mm), build the fill in two or three thin layers. Let each layer dry before you add the next. One thick layer cracks and sinks.
Using two-part epoxy on a door edge? Mix only what you can use in 5 to 10 minutes. Wrap a piece of painter’s tape along the door face so the edge fills square.
Step 6: Sand the Filler Smooth
Wait until the filler dries all the way through. Many spackles change from pink or gray to white when ready. Check the label, too: small spackle patches often dry in 30 minutes to 2 hours, while wood filler and deep fills need longer. If the filler gums up your sandpaper, give it more time.
Wrap 220-grit sandpaper around a sanding sponge or block and sand in light circles until the patch sits flush. On wood filler or epoxy, start with 150-grit, then finish with 220. Check the patch again with your low flashlight. A shadow means you need another thin coat of filler.
Textured walls: Smooth patches stand out on textured walls. Thin a spoonful of joint compound with water until it looks like pancake batter. Dab it onto the patch with a damp sponge or stiff brush, test the look on cardboard first, and let it dry before priming.
Wipe off all dust with a damp, lint-free cloth.
Step 7: Prime the Patch
Don’t skip primer. Bare filler soaks up paint faster than the painted surface around it. That leaves a dull, blotchy spot painters call flashing. Primer seals the filler and gives touch-up paint an even base.
| Surface | Primer to use |
|---|---|
| Interior drywall or plaster | Water-based drywall primer or stain-blocking primer |
| Wood doors and trim with latex paint | Water-based or oil-based wood primer |
| Glossy trim or oil-based paint | Bonding primer, after a light scuff-sand |
| Metal doors | Rust-inhibiting metal primer |
| Stains from water or smoke | Shellac-based or oil-based stain blocker |
Apply a thin coat over the patch and feather it about 1 inch past the edges. Let it dry for the time on the can, often about 1 hour. If you still see the edge of the patch, sand lightly with 220-grit and prime once more.
Step 8: Match the Color and Sheen
Your repair only disappears if the color and the sheen both match. Try these sources from best to worst:
- The original can. Check the lid for the brand, color name, color code, and sheen. Stir for 2 minutes and strain out any skin or lumps. Old paint thickens and shifts over time, so test it first.
- The color name from your records. Look at receipts, builder papers, or a landlord’s paint list, then buy a fresh sample pot.
- A paint store scan. Cut a flake about the size of a coin from inside the damaged area or a hidden spot, like the back of a door. A paint store scanner reads the flake and mixes a close match.
- A color fan deck. Use this only as a last resort, and check it in daylight.
Match the sheen, too. Common sheens run from flat to matte, eggshell, satin, semi-gloss, and gloss. Most walls use flat, matte, or eggshell. Most doors and trim use satin or semi-gloss. A shiny patch on a flat wall shows more than a small color difference.
Test before you commit. Paint a swatch on white cardboard with two coats, let it dry fully, and hold it against the surface in daylight. Wet paint looks different from dry paint.
Know the limits. Walls and trim fade, yellow, and pick up grime over years. A perfect formula may still look off on a surface painted 5 to 10 years ago. If so, repaint the whole wall from corner to corner, or the full length of trim or the whole door face.
Step 9: Apply the Touch-Up Paint and Feather the Edges
Use the same tool the last painter used. That means a mini roller on rolled walls and a brush on brushed trim and doors. Different tools leave different textures, and texture shows under light.
Load your brush or roller lightly. Start in the center of the primed patch and work outward. As you reach the edges, lift your pressure so the paint thins out and blends into the old paint. This technique is called feathering. Stretch the paint 2 to 3 inches past the patch on walls.
Apply two thin coats instead of one thick one. Thick coats drip, dry with ridges, and look shinier. Wait for the first coat to dry to the touch before you add the second. On trim, brush along the length of the board, not across it. Pull painter’s tape slowly at a sharp angle while the last coat is still slightly soft, so it doesn’t lift fresh paint.
Let it cure. Paint feels dry in about an hour, but it stays soft for days. Wait at least 24 hours before you close a freshly painted door fully, or the door will stick to the frame and tear the paint. Painters call this blocking. Most paints reach full hardness in 2 to 4 weeks, so wash the repair gently until then.
Step back and check the repair from across the room, at eye level, in daylight and lamplight. That’s how everyone else will see it.
Surface-by-Surface Guide
The 9 steps stay the same on every surface, but the filler, grit, primer, and tool change.
| Surface | Paint filler | Final grit | Primer | Applicator | Watch out for |
|---|---|---|---|---|---|
| Chipped walls (drywall) | Lightweight spackle | 220 | Drywall primer | Mini roller | Torn paper, wall texture |
| Plaster walls | Spackle or joint compound | 220 | Stain-blocking primer | Mini roller | Hairline cracks, lead in old layers |
| Wood doors | Wood filler or epoxy | 220 | Wood or bonding primer | Brush or foam roller | Oil-based paint, blocking |
| Trim and baseboards | Epoxy or wood filler | 220 | Bonding primer | Angled brush | Yellowed white enamel |
| Metal doors | Two-part body filler | 220 | Rust-inhibiting primer | Foam roller | Rust under the chip |
| Exterior walls and trim | Exterior acrylic filler | 150 to 220 | Exterior primer | Brush or roller | Rain, direct sun, cold |
Chipped Walls
Walls forgive more than trim because most wall paint has a low sheen. Keep your touch-up paint patch small and feathered, and always roll it with a mini roller if the wall has a rolled finish. A brushed patch on a rolled wall shows as a smooth, flat island.
Doors
Door edges take the most hits of any painted surface in a home. Use two-part epoxy on the latch edge and the corners, because soft fillers knock loose within months. Before you repair a chip on the hinge side or top edge, open and close the door slowly. If the door rubs the frame, the rubbing caused the chip. Tighten the hinge screws first. If it still rubs, plane or sand the edge, then prime and paint that bare edge, too.
Trim and Baseboards
Most trim wears semi-gloss or gloss paint, and shine shows every flaw. Sand the patch with extra care and brush thin coats along the length of the board. White trim yellows with age, especially oil-based paint. A bright new white patch on 10-year-old trim will stand out, so plan to repaint that full piece of baseboard or casing from corner to corner.
Metal Doors
Sand any rust down to shiny metal with 120-grit, then wipe the spot with rubbing alcohol. Fill deep chips with two-part body filler, sand, and prime with a rust-inhibiting primer within an hour. Bare steel starts to rust fast, especially on exterior doors.
Exterior Surfaces
Outside paint expands and shrinks with heat and cold, so use exterior-rated filler, primer, and paint. Interior spackle fails outdoors. Paint on a dry day when rain stays away for at least 24 hours, and keep out of direct midday sun, which dries touch-up paint too fast and leaves lap marks. Check the can for the minimum temperature, often around 50°F (10°C).
Troubleshooting: Why Your Touch-Up Still Shows
Most visible touch-ups come from a few common problems, and each has a simple fix.
| Problem | Likely cause | Fix |
|---|---|---|
| Patch looks shinier or duller than the wall | Wrong sheen, or no primer over the filler | Prime the patch, then use paint with the matching sheen |
| You can see a ring around the patch | Chip edge not sanded, or paint not feathered | Sand the ring flat with 220-grit, prime, and feather wider |
| Patch sinks or shows a dent | Filler shrank; one thick layer | Add a thin second coat of filler, sand, and prime again |
| Color looks right up close but wrong from across the room | Aged or faded surface paint | Repaint the full wall or the whole trim piece |
| Paint peels off the patch | Latex over oil-based paint, or a dusty or greasy surface | Scuff-sand, clean, use bonding primer, repaint |
| Smooth patch on a textured wall | Texture not rebuilt | Dab thinned joint compound to copy the texture, then prime |
| New chips keep appearing nearby | Poor adhesion across the area | Run the tape test; scrape and prime the wider area |
| Door sticks to the frame | Paint not cured, or door rubs the frame | Wait 24 to 48 hours; fix hinges or plane the edge |
How to Stop Paint From Chipping Again
Fix the cause, not just the chip, or the same spot will need a touch-up in six months.
- Add door stops so handles never strike the wall.
- Stick felt pads on chair backs, bed frames, and furniture that touch walls.
- Fix rubbing doors by tightening hinge screws before you repaint the edge.
- Use tougher sheens where hits happen. Satin or semi-gloss on trim and doors resists knocks and wipes clean.
- Prime every bare spot and use a bonding primer over glossy or oil-based paint.
- Control moisture in bathrooms and kitchens with an exhaust fan and a fast fix for any leak.
- Let fresh paint cure for 2 to 4 weeks before you scrub it or push furniture against it.
- Save leftover paint in a small, airtight jar. Label it with the room, brand, color name, sheen, and date.
Time and Cost
| Job | DIY cost | Hands-on time | Ready to use |
|---|---|---|---|
| Tiny surface nick, no dent | Under $10 with leftover paint | 10 minutes | 1 to 2 hours |
| Single wall chip with filler | $25 to $40 | 30 minutes | Same day |
| Door edge chip with epoxy | $30 to $50 | 45 minutes | 24 hours before closing the door |
| Several chips across a room | $40 to $70 | 2 to 3 hours | Next day |
Prices vary by store and brand. A professional touch-up visit usually costs more than supplies but covers every chip in the house in one trip, with proper color matching.
Frequently Asked Questions
Can I paint over chipped paint without sanding?
You can, but the chip will still show. Paint follows the shape underneath it, so the dent and its hard rim stay visible under fresh color. Sanding the edge takes about two minutes and makes the difference between a hidden repair and an obvious one.
What is the best paint filler for chipped paint?
Use lightweight spackle for chipped walls indoors. Use wood filler or two-part epoxy for doors, trim, and baseboards, because they take more hits. Use exterior acrylic filler outdoors and two-part body filler on metal doors.
Do I need primer for small paint chips?
Yes, if the chip shows bare drywall, wood, metal, or filler. Bare spots soak up paint and dry dull. If you see only a scuff in the top coat with no bare surface, sand lightly and apply touch-up paint without primer.
How long should paint filler dry before I paint?
Small spackle patches often dry in 30 minutes to 2 hours. Deep fills, wood filler, and epoxy need longer, sometimes overnight. Follow the label and sand a corner to test. If the filler gums up the paper, wait longer.
Why does my touch-up paint look different from the wall?
The old paint has faded, yellowed, or lost shine over time, while fresh paint looks brighter. A wrong sheen, a different tool, or unprimed filler also cause the difference. Prime the patch, match the sheen, use the same applicator, and feather the edges.
How do I find my wall paint color?
Check the lid of any leftover paint can for the brand, color name, and code. If you have no can, cut a coin-sized flake from the damaged area and take it to a paint store for a scan.
Can I use a touch-up paint pen on doors and trim?
Yes, for tiny nicks with no depth. A pen only adds color, so it won’t fill a dent. For any chip you can feel with a fingertip, fill, sand, and prime first.
Should I touch up or repaint the whole wall?
Touch up when you have the original paint and the wall is less than about five years old. Repaint the whole wall, door face, or trim piece when the old paint has faded, you can’t match the sheen, or the patch still shows after two tries.