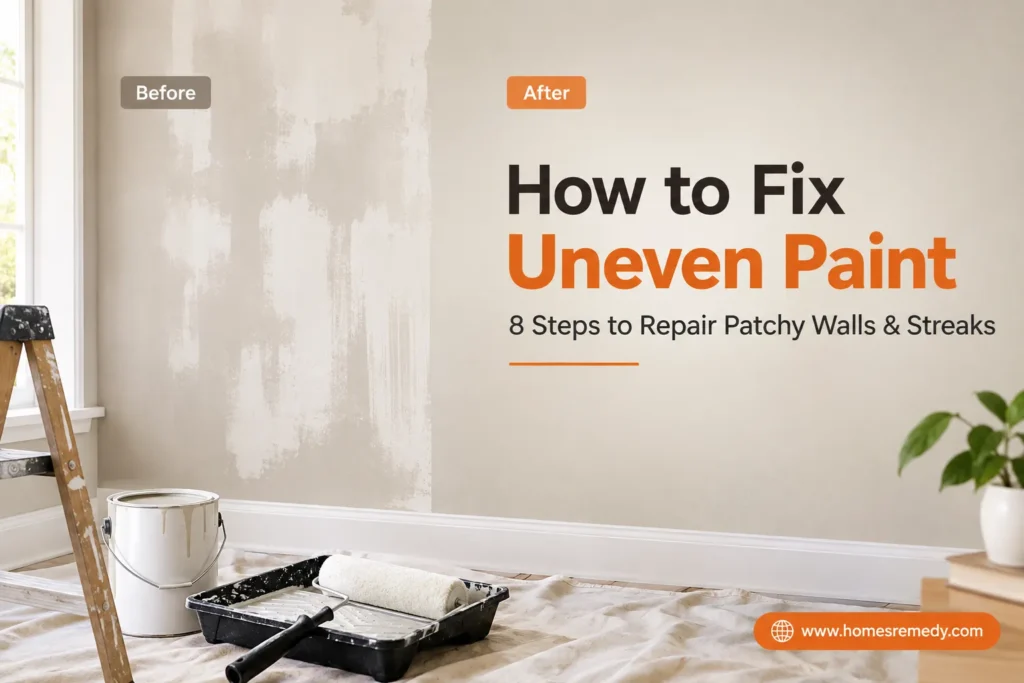
You finish painting and step back to admire your work. Then you see it: light patches, streaks, and spots that shine more than the rest of the wall.
Don’t worry. Uneven paint is one of the most common DIY painting problems, and you can fix it in most cases. This guide by Homes Remedy Experts shows you how to fix uneven paint in 8 simple steps. You’ll also learn what causes it, how to spot each type, and how to stop it from happening again.
To fix uneven paint, let the paint dry fully and check the wall under angled light. Sand any rough spots, wipe away the dust, and prime patched or bare areas. Then roll a fresh, even coat over the whole wall while keeping a wet edge. Most walls look smooth after one or two new coats.
What Is Uneven Paint?
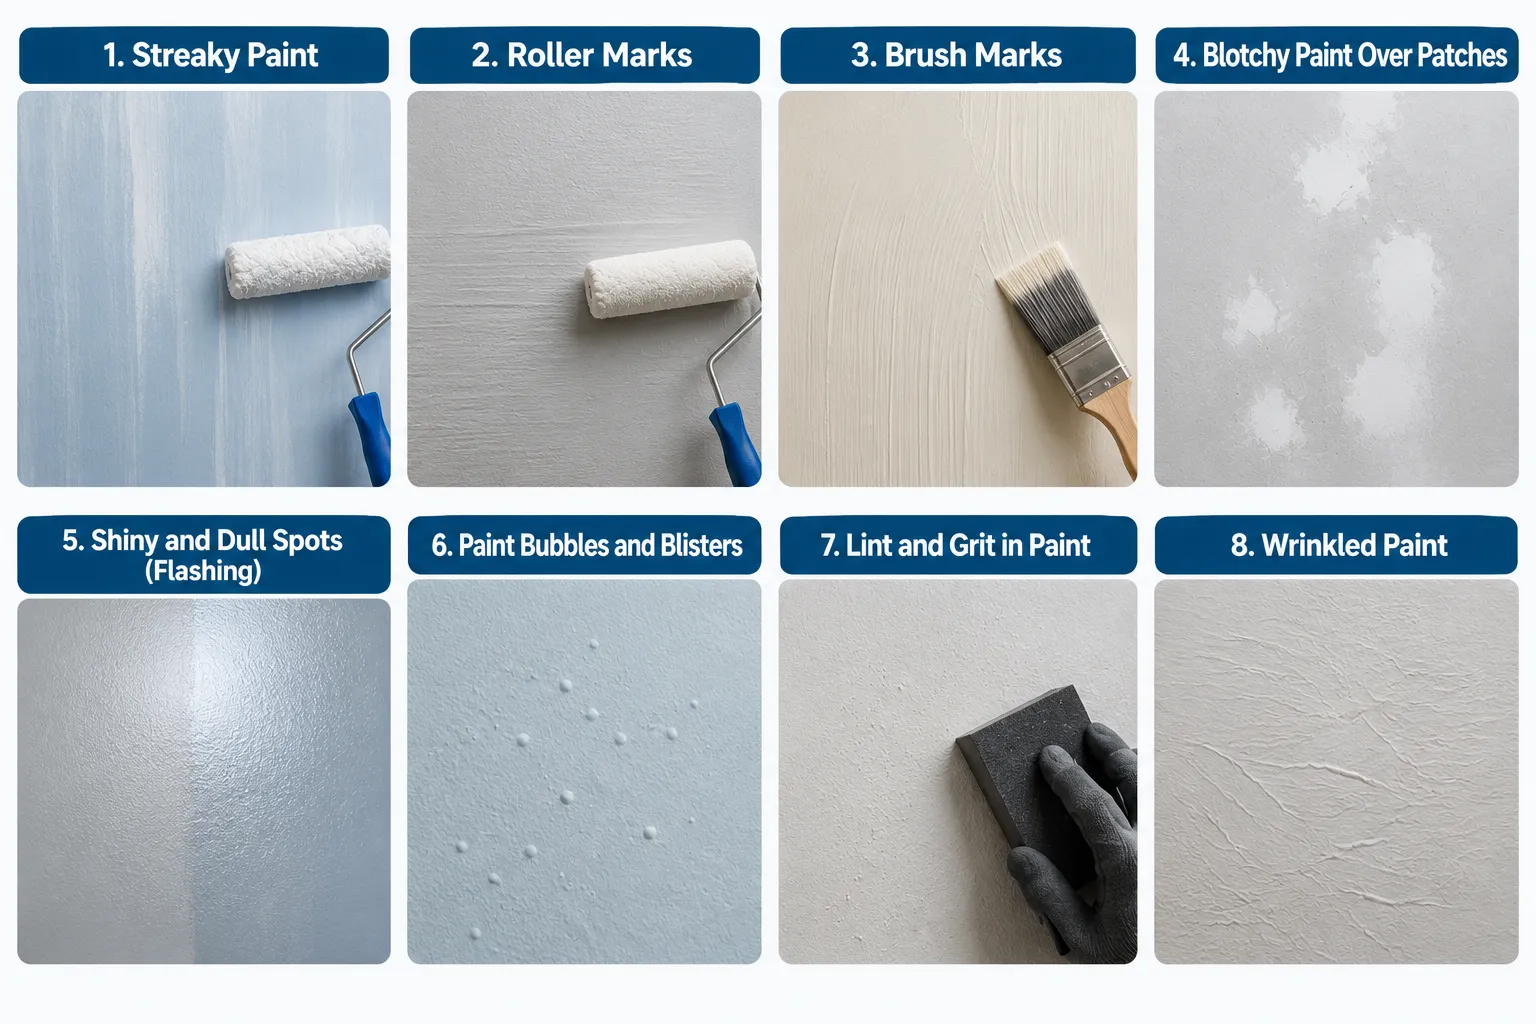
Uneven paint is a finish where the color, coverage, texture, or shine changes from one spot to the next. It can show up as patchy walls, streaky paint, roller marks, brush marks, or blotchy paint. It can also look like shiny and dull spots on the same wall.
Each type has a different cause, so the first job is to figure out which one you have.
Types of Uneven Paint and How to Spot Them
| Problem | What It Looks Like | Most Common Cause |
|---|---|---|
| Patchy walls | Old color shows through in thin spots | Too few coats or too little paint |
| Streaky paint | Long lines of light and dark color | Too little paint on the roller, or uneven pressure |
| Roller marks (lap marks) | Stripes where roller passes overlap | Rolling over paint that had started to dry |
| Brush marks | Visible lines near edges and corners | A cheap brush, overworked paint, or thick paint |
| Blotchy paint | Dull or light spots in random places | Unprimed patches or filler soaking up paint |
| Flashing | Shiny and dull areas on the same wall | Uneven coat thickness, touch-ups, or spongy (porous) spots |
| Bubbles or blisters | Small raised pockets in the paint | Moisture, heat, or a dirty wall |
| Lint or grit | Tiny bumps and fuzz in the finish | Dust on the wall or lint from a new roller |
| Wrinkles | Paint that looks puckered or crinkled | Coats that are too thick, or high heat |
What Causes Uneven Paint?
Most uneven paint comes from rushing or skipping a step. These are the most common causes:
Application mistakes:
- Not enough paint on the roller. A dry roller spreads the paint too thin and leaves streaks.
- Too few coats. Most walls need two coats, and bold or dark colors may need three.
- Losing the wet edge. Rolling over paint that has started to dry leaves lap marks.
- Coats that are too thick. Heavy coats can drip, wrinkle, or dry unevenly.
Paint problems:
- Unstirred paint. Solids sink to the bottom of the can, so the color and shine come out uneven.
- Mixing cans. Two cans of the same color can differ slightly if you don’t combine them first.
Surface problems:
- Skipped primer. Bare drywall, filler, and stains soak up paint at different rates.
- A dirty or greasy wall. Paint can’t grip dust or oil, so it pulls away or bubbles.
Tools and conditions:
- The wrong roller. A nap that’s too short or too long for your wall leaves marks and thin spots.
- Bad conditions indoors. Heat, cold, high humidity, or direct sun can make paint dry unevenly.
Tools and Materials You’ll Need

- Flashlight or work light
- Painter’s tape
- Mild dish soap, a bucket, and a sponge
- Putty knife or paint scraper
- Sandpaper (120–150 grit and 220 grit) or a sanding block or sponge
- Damp microfiber cloth
- Primer (standard, bonding, or tinted, depending on your wall)
- Stir stick or a drill paint mixer
- Large bucket, if you’re mixing more than one can
- Quality roller cover, a roller frame, and a paint tray
- 2- to 2½-inch angled brush
- Dust mask and safety glasses
- Drop cloths
How to Fix Uneven Paint in 8 Steps
Follow these 8 steps in order. Each step builds on the one before it, so don’t skip ahead. Rushing is the main reason paint looks uneven in the first place.

| Project Detail | What to Expect |
|---|---|
| Difficulty | Easy to moderate |
| Active work time | 2 to 4 hours per wall |
| Total time | 1 to 2 days, including drying time |
| Skill needed | Basic painting and sanding |
The 8 steps at a glance:
- Let the paint dry completely.
- Find the problem with a light test.
- Prep the room and clean the wall.
- Scrape and sand rough spots smooth.
- Remove all the dust.
- Prime patches and bare areas.
- Stir the paint and prep your roller.
- Repaint with even coats and a wet edge.
Step 1: Let the Paint Dry Completely
The first step is to wait. Wet paint looks darker and patchier than it will once it dries. Many walls that look uneven on day one look fine by day two.
Why it matters: If you sand or repaint too soon, you can tear the soft paint underneath. You may also “fix” a problem that would have gone away on its own.
How to do it:
- Wait at least 24 hours before you judge the finish.
- Keep the room at a normal temperature, with some fresh air moving through.
- Don’t touch or press on the wall to test it. Fingerprints can leave marks in soft paint.
- If you only plan to add another coat, check the label for the recoat time. For most latex paint, it’s 2 to 4 hours.
Know the difference between dry and cured:
| Term | What It Means | Typical Time for Latex Paint |
|---|---|---|
| Dry to the touch | The surface isn’t sticky | About 1 hour |
| Ready to recoat | Safe to add the next coat | 2 to 4 hours |
| Fully cured | Paint is hard and at full strength | About 2 to 4 weeks |
Common mistake: Judging the wall at night under one lamp. Look again in daylight after the paint has dried.
Step 2: Find the Problem With a Light Test
You can’t fix uneven paint until you know what kind it is. A simple light test shows problems your eyes miss in normal light.
Why it matters: Streaks, flashing, and blotchy paint need different fixes. The light test also tells you how big your repair needs to be, which saves time and paint.
How to do the light test:
- Turn off the overhead lights and close the curtains partway.
- Hold a flashlight flat against the wall so the beam skims across the surface.
- Walk slowly along the wall and look at it from the left, the right, and straight on.
- Mark each problem spot with a small piece of painter’s tape. Don’t use a pencil, because it can show through new paint.
- Step back 6 to 8 feet and look again. Note whether the problem is in one spot or spread across the wall.
What to look for:
- Color differences: Light patches or old color showing through mean thin coverage.
- Shine differences: Shiny or dull patches point to flashing.
- Lines: Straight stripes mean roller marks or brush marks.
- Texture: Bumps, fuzz, or raised pockets mean lint, grit, or bubbles.
Choose the right size of repair:
| What You Found | Best Repair |
|---|---|
| 1 or 2 spots smaller than your hand, on flat or matte paint | Small spot touch-up |
| Streaks, roller marks, flashing, or many spots | Repaint the whole wall, corner to corner |
| Old color showing through, blotchy patches, or uneven paint on every wall | Prime and repaint |
Pro tip: Always repaint to a natural stopping point, like a corner or a trim line. A new coat that stops in the middle of a wall almost always shows.
Step 3: Prep the Room and Clean the Wall
Good prep makes every other step easier. A clean wall helps new paint stick and dry evenly.
Why it matters: Paint can’t grip dust, grease, or soap film. On a dirty wall, new paint may bubble, peel, or pull away and leave small bare spots. Painters call this “cissing.”
Prep the room:
- Move furniture to the middle of the room and cover it with a plastic sheet.
- Lay drop cloths along the base of the wall.
- Remove outlet covers and switch plates. Put the screws in a small bag so you don’t lose them.
- Tape off trim, ceilings, and edges you want to protect.
Clean the wall:
- Dust the wall with a dry microfiber cloth or a broom wrapped in a clean cloth.
- Mix warm water with a few drops of mild dish soap in a bucket.
- Wash the wall with a soft sponge. Wring it out well so water doesn’t run down the wall.
- Rinse with a second sponge and clean water to remove any soap film.
- Let the wall dry fully. This usually takes 1 to 2 hours, or longer on humid days.
Pay extra attention to these areas:
- Kitchen walls, which often have a thin layer of cooking grease.
- Areas around light switches and door handles, where hands touch often.
- Bathroom walls, which may have soap scum or mildew. Treat mildew with a mildew cleaner before you paint.
Common mistake: Skipping the rinse. Leftover soap stops paint from sticking, just like dirt does.
Step 4: Scrape and Sand Rough Spots Smooth
Sanding removes anything that sticks out from the wall, such as drips, ridges, bubbles, lint, and wrinkles. It also roughens the surface a little so new paint can grip.
Why it matters: New paint doesn’t hide bumps. It coats them and makes them stand out even more. A smooth wall is the base of a smooth paint finish.
Safety first: If your home was built before 1978, test the paint for lead before you sand or scrape. See the safety tips below.
Pick the right sandpaper:
| Grit | Type | Use It For |
|---|---|---|
| 120 to 150 | Medium | Drips, ridges, wrinkles, and scraped bubbles |
| 220 | Fine | Smoothing scratches, brush marks, and light lint |
| Sanding sponge | Flexible | Corners, edges, and curved spots |
How to sand:
- Scrape off bubbles, blisters, and thick drips first. Hold a putty knife at a low angle and push gently.
- Wrap medium sandpaper around a sanding block. A block keeps the pressure even so you don’t dig holes.
- Sand in small circles with light pressure. Let the paper do the work.
- Switch to 220-grit sandpaper to remove the scratches from the first round.
- Feather the edges. Use lighter strokes as you move outward so the repair fades into the rest of the wall.
Check your work: Close your eyes and run your palm over the spot. If you can’t feel a ridge or bump, you’re done. Your hand often finds problems your eyes miss.
For glossy walls: Lightly scuff the whole area with 220-grit sandpaper. Glossy paint is slick, and new paint won’t bond well without a little texture.
Common mistake: Sanding too hard in one spot. This makes a shallow dip that shows up as a shadow once you paint.
Step 5: Remove All the Dust
Sanding leaves fine dust on the wall, the trim, and the floor. It must all go before you prime or paint.
Why it matters: Dust mixes into wet paint and dries as tiny bumps. It also stops primer and paint from bonding to the wall, which can lead to peeling later.
How to remove dust:
- Vacuum the wall with a soft brush attachment, working from top to bottom.
- Vacuum the floor, drop cloths, and window sills so dust doesn’t blow back onto the wall.
- Wipe the wall with a damp microfiber cloth. Wring it out until it’s barely wet.
- Rinse the cloth often in clean water so you don’t spread the dust around.
- Let the wall dry for about 30 minutes before you prime.
Quick test: Wipe the wall with a clean, dark cloth. If it comes away dusty, wipe the wall again.
Pro tip: Turn off fans and close windows while you clean up dust. Moving air carries dust back onto the wall you just wiped.
Step 6: Prime Patches and Bare Areas
Primer is the key to fixing blotchy paint and patchy walls. It seals the surface so paint soaks in the same way everywhere.
Why it matters: Wall filler, spackle, sanded spots, and bare drywall soak up paint faster than painted areas. That leaves dull, light patches. No matter how many coats of paint you add, those spots often keep showing through until you prime them.
Choose the right primer:
| Primer Type | Use It When |
|---|---|
| Standard primer | You have patches, filler, or bare drywall |
| Bonding primer | The wall is glossy, slick, or hard for paint to stick to |
| Tinted primer | You’re making a big color change. Gray primer helps under dark or bold colors. |
| Stain-blocking primer | You need to cover water stains, marker, or smoke marks |
How to prime:
- Stir the primer well before you use it.
- Use a small brush or mini roller for spot-priming patches.
- Spread the primer slightly past the edge of each patch, then feather it out thin.
- For a whole wall, roll the primer on just like paint, in small sections.
- Let it dry as the label says. This usually takes 1 to 3 hours.
- Check for rough spots once it’s dry. Lightly sand them with 220-grit sandpaper and wipe away the dust.
When to prime the whole wall instead of spots:
- The wall has many patches spread across it.
- You’re changing from a dark color to a light one, or from light to dark.
- The old paint is glossy and you’re switching to a flat or matte finish.
Common mistake: Skipping primer on small patches because they “look fine.” They almost always flash through the final coat.
Step 7: Stir the Paint and Prep Your Roller
The right paint prep and the right roller prevent most streaky paint and roller marks before they start.
Why it matters: Paint separates as it sits, and the heavy parts sink to the bottom of the can. Unstirred paint goes on with uneven color and shine. A wrong or linty roller adds marks, fuzz, and thin spots.
Prepare the paint:
- Stir it well. Stir for 2 to 3 minutes, scraping the bottom and sides of the can. A paint mixer on a drill makes this faster.
- Mix your cans together. Pour all your cans of the same color into a large bucket and stir. Painters call this “boxing.” It keeps the color the same across the whole wall.
- Check old paint. A thick skin, lumps, or a sour smell means the paint may be bad. Strain out small lumps through a paint strainer, or buy fresh paint.
- Use the same paint and sheen. For repairs, use the same brand, color, and finish that’s already on the wall.
Pick the right roller nap:
Nap is the length of the fuzzy fibers on a roller cover. Longer nap holds more paint and reaches into texture. Shorter nap leaves a smoother finish on flat walls.
| Wall Surface | Roller Nap |
|---|---|
| Smooth to lightly textured walls | 3/8 inch |
| Medium texture | 1/2 inch |
| Rough or heavy texture | 3/4 inch |
Prep the roller:
- Wrap painter’s tape around your hand, sticky side out, and pat the roller to pull off loose lint.
- Dampen the roller with water if you’re using latex paint.
- Squeeze or spin out the extra water. The roller should feel damp, not wet.
- Roll it through the paint tray several times until it’s evenly loaded, with no dry patches.
Pro tip: Buy a quality roller cover. Cheap covers shed lint and hold less paint, which leads to streaks and roller marks.
Step 8: Repaint With Even Coats and a Wet Edge
This is where all your prep pays off. Good technique gives you a smooth paint finish with no streaks, lap marks, or patchy spots.
Why it matters: Most uneven paint comes from how the paint goes on. Thin coats, stopping mid-wall, and rolling over drying paint all leave marks you can see.
Check the conditions first:
- Most latex paint works best between about 50°F and 90°F (10°C to 32°C). Check your label for its exact range.
- Avoid very humid days, because paint dries slowly and unevenly.
- Keep direct sunlight off the wall, since it makes paint dry too fast.
- Don’t point fans straight at wet paint. Gentle airflow from an open window is fine.
Cut in the edges:
- Dip an angled brush about one-third of the way into the paint and tap off the extra.
- Paint a 2- to 3-inch band along the ceiling line, corners, trim, and outlets.
- Cut in one wall at a time, then roll that wall right away. This way, the brushed edges are still wet when the roller meets them, so they blend in.
Roll the wall:
- Load the roller fully. If you have to press hard to get paint on the wall, reload.
- Start about a foot from a corner and roll a large “W” or “M” shape, about 3 feet wide.
- Fill in the shape with back-and-forth strokes without lifting the roller.
- Finish the section with light, straight strokes from ceiling to floor, all in the same direction.
- Move to the next section and overlap the wet edge of the last one by a few inches.
Keep a wet edge:
A wet edge means you always roll new paint into paint that’s still wet. This stops lap marks from forming.
- Roll from the dry area back into the wet paint, never the other way.
- Finish one full wall before you take a break.
- Never go back over paint that feels tacky (sticky). Let it dry and fix it with the next coat.
Apply the second coat:
- Wait for the full recoat time on the label. For most latex paint, it’s 2 to 4 hours.
- Do the light test again and look for thin spots.
- Apply the second coat the same way: cut in, roll in sections, and keep a wet edge.
- For dark or bold colors, plan on a third coat.
Clean up the right way:
- Remove painter’s tape while the last coat is still slightly wet. Pull it slowly at a 45-degree angle.
- Clean your brushes and rollers with warm, soapy water for latex paint.
- Put the outlet covers back on once the paint is dry to the touch.
Common mistake: Painting only over the bad spots. Always paint the whole wall from corner to corner so the color and sheen match.
How to Fix Specific Paint Problems
How to Fix Streaky Paint
Streaks usually mean the paint went on too thin. Let the wall dry, sand any ridges, and add another full coat. Load the roller well and use steady, even pressure.
How to Fix Roller Marks
Roller marks, also called lap marks, form when you roll over paint that has started to dry. Sand the ridges lightly, wipe off the dust, and repaint the whole wall with a wet edge. A quality roller cover with the right nap helps a lot.
How to Fix Brush Marks
Sand the brush marks with fine 220-grit paper and wipe them clean. Repaint using a quality angled brush. Don’t overwork the paint: brush it on, smooth it once, and move on.
How to Fix Blotchy Paint Over Patches
Light or dull spots over filled holes mean the patches weren’t primed. Spot-prime each patch, let it dry, and repaint the whole wall. More coats of paint alone rarely hide unprimed patches.
How to Fix Shiny and Dull Spots (Flashing)
Flashing happens when some areas get a thicker coat than others, or when paint soaks into spongy spots. Glossy and satin paints show it most, while flat paint hides it best. To fix it, prime any patches and apply one more even coat across the whole wall.
How to Fix Paint Bubbles and Blisters
Find the cause first, such as a damp wall, a leak, high humidity, or dirt under the paint. Once it’s fixed, scrape the bubbles off and sand smooth. Prime the area, then repaint.
How to Fix Lint and Grit in Paint
Lightly sand the bumps with a sanding sponge until the wall feels smooth. Wipe away the dust and repaint the spot. Next time, de-lint your roller and clean the wall before painting.
How to Fix Wrinkled Paint
Wrinkles come from thick coats or high heat. Sand the wrinkles flat, clean the area, and repaint on a mild day. Use thinner coats this time.
Can You Fix Uneven Paint With Touch-Ups?
Sometimes. Paint touch-ups work best for small spots on flat or matte walls. For the best chance of success:
- Use the same can of paint you used on the wall.
- Use the same tool you used on that area. A roller leaves a different texture than a brush.
- Apply a thin coat and feather the edges outward.
- For latex paint, you can add a small splash of water to help it blend. Check the label first, because too much water weakens coverage.
Touch-ups often fail on satin or glossy paint, on older paint, and in large areas, because the new paint dries with a different shine. If your touch-up stands out, repaint the whole wall from corner to corner. It takes a bit more time, but it gives you a result you’ll be happy with.
How to Prevent Uneven Paint Next Time
- Clean and patch the walls before you paint.
- Prime all patches, bare drywall, and big color changes.
- Stir the paint well, and mix multiple cans together.
- Use a quality roller with the right nap for your wall.
- Load the roller fully and reload often.
- Keep a wet edge and finish each wall without stopping.
- Plan for two coats, and wait the full recoat time between them.
- Paint in mild temperatures, out of direct sun.
- Clean your brushes and rollers after every use.
Safety Tips
- Open windows and use fans to move air out of the room.
- Wear a dust mask and safety glasses when you sand.
- Be careful in older homes, especially those built before 1978. Old paint layers may contain lead. Don’t sand or scrape until you test the paint. If it contains lead, hire a certified lead-safe professional.
Frequently Asked Questions
Why does my paint look patchy after drying?
Patchy paint usually means the coat went on too thin, the paint wasn’t stirred, or the wall soaked up paint unevenly. Unprimed patches and bare drywall are common reasons. A coat of primer on those spots, then a fresh, even coat of paint, usually fixes it.
Will a second coat fix uneven paint?
A second coat fixes most thin spots, streaks, and patchy coverage. It won’t fix drips, bubbles, lint, or blotches caused by unprimed patches. Sand and prime those first, then add the second coat.
How long should I wait between coats of paint?
Most latex paint can take a second coat after 2 to 4 hours. Oil-based paint often needs up to 24 hours. Always follow the label, and wait longer on cool or humid days.
Should I sand between coats of paint?
You only need to sand between coats if you see drips, bumps, lint, or brush marks. Use fine 220-grit sandpaper with light pressure, then wipe off all the dust before you paint again.
Why does my wall have shiny and dull spots?
This is called flashing. It happens when parts of the wall get a thicker coat, when touch-ups dry with a different shine, or when patches soak up paint. Priming patches and repainting the whole wall evens out the sheen.
Do I need primer to fix patchy walls?
Yes, if the patchy spots are over filler, bare drywall, stains, or a big color change. Primer seals the surface so paint dries the same way everywhere. Without it, blotchy paint often keeps showing through.
Can I paint over roller marks?
Yes, but sand any raised ridges first and wipe off the dust. Then repaint the whole wall with a fully loaded roller and a wet edge. Painting over the marks without sanding often leaves them visible.
How do I get a smooth paint finish with a roller?
Use a quality roller with the right nap, and load it fully with paint. Roll in small W-shaped sections and keep a wet edge. Finish each section with light top-to-bottom strokes, and apply two thin, even coats instead of one thick coat.
Final Thoughts
Uneven paint can be frustrating, but it’s rarely permanent. Now you know how to fix uneven paint: find the cause, clean and sand the wall, prime what needs it, and repaint with even coats and a wet edge. Take your time with prep and technique, and your walls will have a smooth, even finish that looks professionally done.