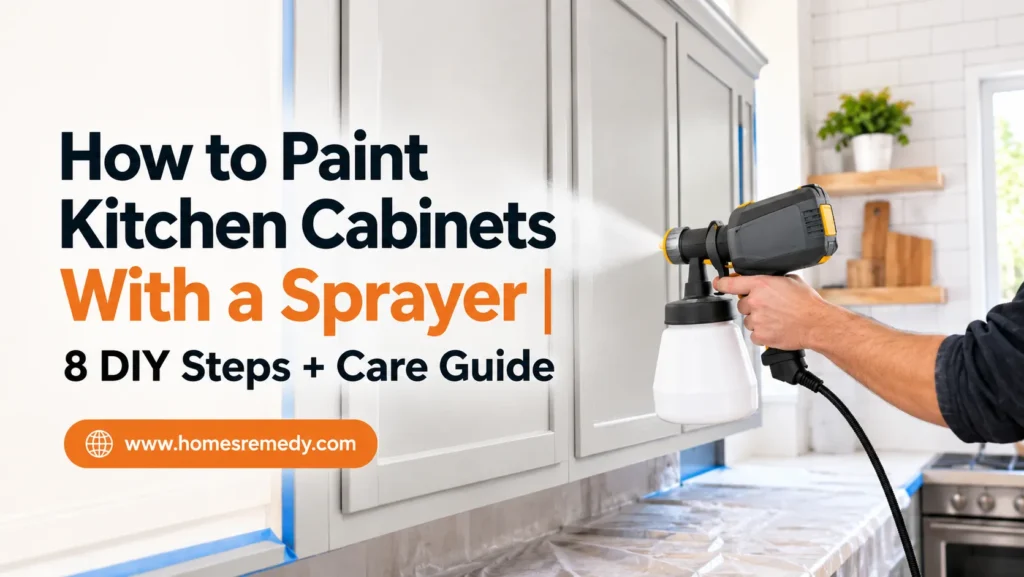
If you’re learning how to paint kitchen cabinets, a paint sprayer is one of the best ways to get a smooth, factory-like finish. There are no brush marks and no roller texture, just an even coat of color.
But the sprayer only does part of the work. Cleaning, sanding, priming, and patience decide how good your cabinets look and how long the paint lasts. This guide by homes Remedy covers every step, from choosing a sprayer to caring for your finished cabinets.
Spraying Kitchen Cabinets at a Glance
| Question | Short Answer |
|---|---|
| Best sprayer type | An HVLP sprayer is the easiest choice for most DIYers. It gives fine control and less overspray. An airless sprayer with a fine-finish tip is faster but harder to control. |
| Is sanding necessary? | Usually yes. A light scuff-sand helps primer grip. You don’t need to sand down to bare wood. |
| Is primer needed? | Almost always, especially on glossy, stained, oak, or laminate cabinets. |
| Number of coats | Usually 1 coat of primer and 2 thin coats of paint. Big color changes may need a third. |
| Project duration | Plan for several days of work, plus extra time for the paint to cure. Your paint label sets the real timeline. |
| Most important tip | Keep the sprayer moving and spray thin coats. Heavy coats cause runs and drips. |
Can You Spray Paint Kitchen Cabinets?
Yes. Most kitchen cabinets can be sprayed if the surface is solid and properly prepared. The cabinet material decides how you prep it.
- Wood cabinets: Solid wood takes paint well after cleaning, sanding, and priming.
- Oak cabinets: Oak has deep, open grain that still shows after painting. If you want a completely smooth look, apply a grain filler before priming. If you don’t mind some texture, skip it.
- MDF cabinets: MDF sprays beautifully smooth. Seal cut edges well, because raw MDF edges soak up paint and can swell.
- Laminate cabinets: Laminate is slick and paint struggles to stick. Clean it well, scuff it lightly, and use a bonding primer made for glossy surfaces. The laminate must not be peeling or bubbling.
- Veneer cabinets: Veneer is a thin layer of real wood over a core. Sand very gently, because it’s easy to sand through.
- Previously painted cabinets: These can be repainted if the old paint is firmly attached. Sand away any chipping or peeling areas first.
- Stained cabinets: These need deglossing and a stain-blocking primer. Some woods release tannins, which can bleed through light paint as yellow-brown spots.
When to repair or replace instead: Paint won’t fix warped doors, peeling laminate, water-damaged boxes, or loose joints. Repair or replace those parts first.
Older homes: If your home was built before 1978 and the cabinets have old paint, that paint may contain lead. Test before sanding, and get professional help if lead is present. Sanding lead paint creates dangerous dust.
Sprayer vs. Brush and Roller: Which Is Better for Kitchen Cabinets?
There’s more than one way to paint kitchen cabinets. Here’s how spraying compares.
| Factor | Paint Sprayer | Brush and Roller |
|---|---|---|
| Finish | Smoothest, no brush or roller marks | Good, may show light texture |
| Speed of painting | Fast once set up | Slower, especially on detailed doors |
| Setup and masking | A lot. Overspray travels far. | Minimal |
| Cleanup | Longer. The sprayer must be fully cleaned. | Quick |
| Skill needed | Moderate. Practice first. | Beginner-friendly |
| Best for | Full kitchens, Shaker or raised-panel doors | Small kitchens, touch-ups, tight budgets |
Bottom line: If you want the smoothest finish and have space to set up, a sprayer is worth it. If you have only a few cabinets, a brush and foam roller may be enough.
HVLP vs. Airless Sprayer for Cabinets
The two main sprayer types work very differently.
| HVLP Sprayer | Airless Sprayer | |
|---|---|---|
| How it works | Uses lots of air at low pressure to break paint into a fine mist | Pushes paint through a tiny tip at high pressure |
| Finish quality | Very fine, smooth | Very good with a fine-finish tip |
| Overspray | Low | Higher |
| Speed | Slower | Faster |
| Paint thinning | Thick paints often need thinning (only if the label allows) | Usually sprays paint with little or no thinning |
| Best for | DIYers, doors, detailed work | Large kitchens, experienced users |
For most first-time DIYers, HVLP is the safer choice. It’s easier to control and makes less mess.
Understanding airless tip numbers: Airless tips use a three-digit code. Double the first digit to get the approximate fan width in inches. The last two digits show the size of the tip opening. So a “310” tip sprays about a 6-inch-wide fan through a small opening. Cabinets usually call for small, fine-finish tips. Always check your paint’s data sheet for the recommended tip size.
What You Need to Spray Paint Kitchen Cabinets
Gather everything before starting. Running to the store mid-project leaves primer or paint waiting too long.
Spraying equipment
- Paint sprayer (HVLP or airless)
- Correct spray tip or nozzle for your paint
- Paint strainer bags
- Viscosity cup (often included with HVLP sprayers)
- Cardboard or scrap wood for test spraying
Prep supplies
- Degreaser made for pre-paint cleaning
- Non-scratch scrub pads and clean rags
- Wood filler and putty knife
- Sandpaper or sanding sponges in medium and fine grits
- Liquid deglosser (optional)
- Tack cloth or microfiber cloth
- Vacuum with a brush attachment
- Screwdriver or drill
- Labels, tape, and small bags for hardware
Primer and paint
- Cabinet primer matched to your cabinet material
- Cabinet paint or enamel
- Thinner or water, only if the product instructions allow thinning
Masking and protection
- Painter’s tape
- Drop cloths
- Plastic sheeting
- Masking paper or tape-and-drape film
Safety equipment
- Respirator rated for paint spray (a dust mask isn’t enough)
- Safety glasses
- Gloves
- Long sleeves or a disposable painting suit
Ventilation and drying
- Fan placed in a window blowing outward
- Painter’s pyramids or a drying rack
What Type of Paint Is Best for Spray Painting Cabinets?
Cabinets get touched, bumped, and wiped every day. Regular wall paint usually isn’t tough enough. Choose a paint made for cabinets, trim, or furniture.
| Paint Type | Durability | Smoothness | Drying & Recoat | Spray Notes |
|---|---|---|---|---|
| Cabinet enamel | Dries hard and resists wear | Levels well | Varies by product | Many are made for sprayers |
| Acrylic or urethane-modified acrylic | Good scuff and stain resistance | Smooth when sprayed thin | Usually faster than oil | Often sprays well; check thinning rules |
| Water-based (latex) paint | Good if it’s a cabinet-grade formula | Can show texture if sprayed too thick | Fast dry, easy water cleanup | Low odor; may raise grain on bare wood |
| Oil-based or alkyd | Very hard finish | Levels very smoothly | Slow drying, long recoat times | Strong fumes; solvent cleanup; whites may yellow over time |
| Hybrid (waterborne alkyd) | Hard, oil-like finish | Levels well | Slower than acrylic, faster than oil | Water cleanup; check spray guidance |
What to look for on the label:
- Durability: Words like “cabinet,” “trim,” “enamel,” or “furniture.”
- Adhesion: Use the primer the paint maker recommends.
- Self-leveling: Paint that flattens as it dries hides small spray marks.
- Spray compatibility: The product data sheet often lists sprayer types, tip sizes, and thinning limits.
- Temperature range: Most paints list the room temperature they need to dry properly.
Choosing a sheen: Satin and semi-gloss are popular because they wipe clean easily. High gloss looks sleek but shows dents and surface flaws more clearly. Very flat finishes can be harder to clean.
Buy enough paint: Mix all your cans of the same color together in one large bucket before starting. This is called “boxing” paint. It keeps the color identical across every door.
How to Paint Kitchen Cabinets With a Sprayer: 8 DIY Steps
Step 1: Remove the Cabinet Doors, Drawers, and Hardware
Spraying doors while they hang on the cabinet rarely looks as good. Take them off and spray them flat or hanging in a separate area.
- Empty the cabinets. Spraying and sanding make dust.
- Number every door and drawer. Put a matching number inside the cabinet box.
- A useful trick: write the number inside the hinge cup hole, then cover it with tape. It stays hidden and survives painting.
- Remove hinges, knobs, and pulls. Put each door’s hardware in its own labeled bag.
- Take phone photos of the kitchen before you start. They help later.
Drawers: In most cases, paint only the drawer front, not the whole drawer box. Paint on the sides can make drawers stick when they slide.
Tip: Keep each hinge with its original door. Each hinge wears in slightly differently over time, and mixing them up can make doors hang crooked.
Step 2: Clean and Degrease Every Surface
This is the step people rush most, and it’s a top reason cabinet paint fails.
Kitchen cabinets collect a thin layer of cooking grease and hand oils. You often can’t see it. Primer and paint can’t grip a greasy surface, so the finish may peel or scratch off later. Grease can also cause “fish eyes,” small round craters where paint pulls away from the surface.
How to clean:
- Use a degreaser made for pre-paint cleaning. Follow its mixing and rinsing directions.
- Focus on areas near the stove, range hood, sink, trash can, and handles.
- Scrub with a non-scratch pad, then wipe with clean water if required.
- Let everything dry completely.
Tip: Clean before you sand. Sanding over grease pushes it into the surface and clogs sandpaper.
Step 3: Repair, Sand, and Remove Dust
A sprayed finish is so smooth that it shows every flaw underneath.
Fill holes and dents
- Fill old hardware holes only if you’re changing to new hardware with different spacing.
- Fill dents and gouges with wood filler. Slightly overfill, then sand flat once dry.
Sand or degloss
- Scuff-sand with medium grit to dull the shine. You don’t need to remove the old finish, just rough it up.
- On laminate and veneer, sand very lightly.
- Use a liquid deglosser on detailed trim that’s hard to sand.
- Sand away old drips, bumps, and flaking paint.
Remove all dust
- Vacuum surfaces with a brush attachment.
- Wipe with a tack cloth or slightly damp microfiber cloth.
- Clean the floor and work area too. Dust in the air lands in wet paint.
Tip: Run your hand across each door with your eyes closed. Your fingers find bumps your eyes miss.
Step 4: Mask and Set Up Your Spraying Area
Overspray is the fine mist that drifts away from the spray pattern. It travels farther than most people expect, so careful masking saves hours of cleanup.
In the kitchen, protect:
- Floors: Drop cloths or plastic, taped at the edges.
- Countertops: Plastic or paper, taped along the cabinet edge.
- Appliances: Wrap the fridge, stove, dishwasher, and range hood fully.
- Walls and backsplash: Tape where cabinets meet walls and hang plastic nearby.
- Cabinet interiors: Cover openings with plastic if you’re not painting inside.
- Windows, lights, and outlets: Cover or tape them.
For doors and drawer fronts:
- Set up a separate spray area, such as a garage or covered workspace.
- Hang plastic sheeting to create a simple spray booth that traps overspray and dust.
- Use painter’s pyramids or a drying rack so pieces can dry without touching anything.
Ventilation and safety
- Place a fan in a window blowing outward to pull fumes and mist out.
- Don’t blow fans directly across wet paint. They stir up dust.
- Turn off gas pilot lights and avoid sparks or flames, especially with solvent-based products.
- Check that the room temperature matches your paint label.
Step 5: Prime the Cabinets
Primer is the bridge between the cabinet surface and your paint. It improves adhesion, hides old colors, and blocks stains.
Choose the right primer:
- Bonding (adhesion) primer: For laminate, glossy finishes, and previously painted cabinets.
- Stain-blocking primer: For oak, stained wood, knots, water marks, and smoke stains. Shellac-based and some oil-based primers are strong stain blockers.
- Wood cabinet primer: Many cabinet primers work well on sanded wood.
- Laminate primer: Choose one that specifically lists laminate or slick surfaces.
Make sure the primer and paint are compatible. When in doubt, use the primer your paint maker recommends.
How to spray primer:
- Strain the primer and test-spray first (see Step 6).
- Spray one thin, even coat. Primer doesn’t need to be perfect.
- Let it dry as long as the label says.
- Lightly sand with fine-grit sandpaper to smooth raised grain and dust bumps. Remove all dust.
Tip: Primer makes flaws easier to see. This is your last good chance to fill small dents before color goes on.
Step 6: Prepare and Test the Paint Sprayer
Never aim at a cabinet door first. Always test.
Choose the right tip or nozzle
- The tip controls how much paint comes out and how wide the spray fan is.
- Thicker paints usually need a larger opening. Thinner paints need a smaller one.
- Use the size listed in your sprayer manual or paint data sheet.
Set the sprayer
- Start with low flow or pressure and increase slowly.
- Set the fan direction: a horizontal fan for up-and-down passes, a vertical fan for side-to-side passes.
- On airless sprayers, raise pressure only until the spray pattern has soft, even edges.
Check paint consistency
- Stir the paint well. Don’t shake it hard, which adds bubbles.
- Strain it into the sprayer.
- Thin only if the manufacturer allows it, and only by the amount they list. Too much thinning can cause runs and weaken the finish.
Test spray
- Spray a piece of cardboard or scrap wood.
- Look for an even oval pattern with soft edges.
- If the pattern is heavy in the middle or shows lines (“tails”) at the edges, adjust pressure or paint thickness.
- If the gun spits or sputters, the paint may be too thick or the tip may be clogged.
Tip: Keep a test board nearby. Test again every time you refill or change settings.
Step 7: Spray the Cabinet Doors and Boxes
This is where technique matters most. Go slowly on the first few doors. You’ll speed up naturally.
Hold the right distance
- HVLP sprayers: Usually about 6 to 8 inches from the surface. Some makers suggest even closer on flat panels.
- Airless sprayers: Usually about 12 inches from the surface.
- Always follow your sprayer’s manual.
- Too close causes runs. Too far causes a dry, rough finish because paint starts drying in the air.
Keep the sprayer moving
- Start moving before you pull the trigger.
- Release the trigger before you stop moving.
- Never pause with the trigger pulled. Even a second in one spot can cause a drip.
Keep a steady angle
- Hold the spray gun straight and square to the surface.
- Move your whole arm, not your wrist. Swinging the gun in an arc puts more paint in the middle and less at the ends.
Overlap your passes
- Overlap each pass by about half. Aim the center of the spray at the edge of the last pass.
- Keep passes straight and at a steady speed.
Spray light, even coats
- Your first coat may look a little thin. That’s normal.
- Thin coats level better and run less.
- Trying to cover everything in one heavy coat is the fastest way to get sags.
Spray order for doors
- Spray the back of each door first. Let it dry, then flip and spray the front. The front gets the cleanest finish.
- Spray the edges with a light pass.
- On Shaker or raised-panel doors, spray the inside corners and profiles lightly first.
- Spray the center panel.
- Finish with full, overlapping passes across the rails and stiles (the flat frame pieces).
Spray the cabinet boxes
- Work from top to bottom.
- Spray inside corners and edges first, then flat surfaces.
- Lower the flow a little for tight spots, where overspray bounces back.
Apply the second coat
- Wait for the recoat time on the paint label.
- If your paint allows it, sand lightly with very fine grit and remove dust.
- Spray the second coat the same way: thin, even, and overlapping.
Airless safety: Airless sprayers work at pressures high enough to inject paint through skin. Never point the gun at anyone, never put your hand near the tip, and lock the trigger when you’re not spraying. An injection injury needs emergency medical care, even if it looks small.
Tip: Hold a work light at a low angle to the surface. It shows thin spots and runs while the paint is still wet enough to fix.
Step 8: Let the Cabinets Cure and Reinstall Them
Paint that feels dry isn’t always ready for use. Rushing this step can ruin a good paint job.
| Stage | What It Means | What You Can Do |
|---|---|---|
| Touch dry | The surface feels dry, but the paint is soft underneath | Don’t handle, stack, or close doors |
| Recoat-ready | The paint can take another coat without damage | Apply the next coat |
| Fully cured | The paint has hardened all the way through | Normal use and regular cleaning |
Curing often takes much longer than drying. Depending on the paint, it may take days or weeks. Check your paint label or data sheet for actual times.
Reinstalling:
- Reinstall doors and hardware only after the paint is dry enough for handling, per the manufacturer.
- Hold doors by the edges and handle them gently.
- Tighten screws carefully. Soft paint dents easily.
- Add small clear bumper pads inside doors and drawers to prevent sticking and chipping.
- Avoid heavy use and scrubbing until the paint has cured.
Refreshing old hardware: If you’re keeping your old knobs and pulls, clean them in warm soapy water. You can lightly scuff and spray them with a primer and paint made for metal. Push the screws through cardboard to hold them upright while spraying.
How to Get a Smooth Finish When Spray Painting Cabinets
A smooth finish comes from small details done well every time.
- Correct spray distance: Stay in your sprayer’s recommended range and keep it steady.
- Proper spray pattern: Adjust until your test pattern is even with soft edges.
- Thin coats: Two or three thin coats look better than one thick coat.
- Consistent movement: Move at the same speed across the whole surface. Some DIYers count slowly during each pass to keep timing even.
- Correct viscosity: Viscosity means how thick or runny paint is. Too thick sputters; too thin runs. Thin only within label limits.
- Clean equipment: Dried paint in the tip or filter causes spitting. Clean the sprayer after every session.
- Dust-free workspace: Sweep and vacuum before spraying, and keep people and pets away.
- Good conditions: Very cold, hot, or humid rooms can cause sagging, slow drying, or a cloudy finish.
- Enough drying time: Rushing recoats can leave the paint soft or sticky.
Tip: Light sanding between coats with very fine sandpaper removes tiny dust bumps and makes the final coat look glassy.
Common Spray Painting Problems and How to Fix Them
| Problem | Likely Cause | Solution |
|---|---|---|
| Runs and drips | Coat too heavy, gun too close, or pausing in one spot | Brush out gently while wet. If dry, sand smooth and respray a thin coat. |
| Orange peel (bumpy texture like orange skin) | Paint too thick, pressure too low, or gun too far away | Adjust pressure, thin only if allowed, and move closer. Sand dried texture before recoating. |
| Uneven coverage | Poor overlap, uneven speed, or swinging the wrist | Overlap passes by half and move your whole arm. Add another thin coat. |
| Rough finish | Dust, spraying too far, or paint drying in the air | Clean the space, move closer, and check temperature and humidity. Sand and recoat. |
| Overspray | Pressure too high, wrong tip, or gun too far | Lower pressure, use a smaller tip, and improve masking. Clean fresh overspray with the cleaner the paint label recommends. |
| Paint pooling | Too much paint in corners and grooves | Spray detailed areas lightly first. Brush out pools while wet or sand once dry. |
| Fish eyes (small craters) | Grease or residue left on the surface | Let it dry, sand, clean again with degreaser, and recoat. |
| Poor adhesion | Grease, dust, glossy surface, or wrong primer | Remove failed paint, degrease, scuff-sand, and use the right bonding primer. |
| Peeling paint | Poor prep, moisture, or products that don’t work together | Scrape and sand the area, clean it, spot-prime, and repaint. Confirm primer-paint compatibility. |
| Sticky cabinets | Paint not cured, coats too thick, or high humidity | Allow more cure time, improve airflow, and add bumper pads. |
| Sprayer spitting | Clogged tip, dirty filter, or thick paint | Clean the tip and filter, strain the paint, and check thickness. |
Adhesion test: Once a test area has dried, press painter’s tape onto it firmly and pull it off quickly. If paint comes off with the tape, fix the prep before painting everything.
How to Clean and Care for Spray-Painted Kitchen Cabinets
With the right care, painted cabinets can look good for years. The first few weeks matter most.
- Wait before heavy cleaning: Let the paint cure fully before scrubbing. Until then, wipe gently only when needed.
- Dust regularly: Use a dry microfiber or soft cloth.
- Use a mild cleaner: Warm water with a little dish soap handles most grime. Then wipe the surface dry.
- Avoid abrasive cleaners: Scouring pads, cleaning powders, and melamine sponges can dull or scratch the finish.
- Avoid harsh chemicals: Strong solvents and some heavy-duty degreasers can soften paint.
- Wipe spills quickly: Grease, sauces, and coffee can stain light colors if left to sit.
- Prevent scratches: Use bumper pads and avoid hanging damp towels over doors for long periods.
- Touch up chips: Store leftover paint in a small sealed, labeled jar. Clean the chip, sand lightly, and dab on thin coats with a small artist’s brush.
Tip: Doors near the trash can, sink, and dishwasher usually wear first. Check them every few months so small chips don’t spread.
How Long Does It Take to Spray Paint Kitchen Cabinets?
The total time depends on your kitchen size, door style, paint product, and room conditions.
| Stage | What Affects the Time |
|---|---|
| Preparation (removing, cleaning, repairing, sanding, masking) | Number of doors, amount of grease, repairs needed. Often the longest stage. |
| Priming | Primer type and its dry time before sanding |
| First coat | Number of pieces, door detail, and spraying speed |
| Second coat | Recoat time on the paint label |
| Drying | Temperature, humidity, airflow, and coat thickness |
| Curing | Paint type and manufacturer guidance. Much longer than drying. |
| Reinstallation | How well you labeled doors and hardware |
Drying vs. curing:
- Drying means the water or solvent has evaporated. The paint feels dry to the touch.
- Curing means the paint has hardened all the way through and reached full strength.
A cabinet can feel dry in hours but stay soft enough to dent or stick for much longer. Always follow the drying, recoat, and cure times for your specific primer and paint.
Planning tip: Work in batches. Spray one side of all doors, let them dry, then flip and spray the other side. Drying space is often the real bottleneck, so set up enough racks before you begin.
FAQs About Spray Painting Kitchen Cabinets
1. Can you spray paint kitchen cabinets?
Yes. Wood, MDF, laminate, veneer, and previously painted cabinets can usually be sprayed. Success depends on cleaning, sanding, priming, and spraying thin, even coats.
2. What type of sprayer is best for kitchen cabinets?
An HVLP sprayer is best for most DIYers because it gives fine control and less overspray. An airless sprayer with a fine-finish tip works faster but needs more masking and practice.
3. Can you spray cabinets without sanding?
Sometimes, with a strong bonding primer and a liquid deglosser. Still, a light scuff-sand is the safer choice for good adhesion.
4. Do you need to prime cabinets before spraying?
In most cases, yes. Primer improves adhesion and blocks stains. It’s especially important on laminate, glossy, oak, and stained cabinets.
5. What paint is best for spray painting kitchen cabinets?
Use a durable cabinet enamel, urethane-modified acrylic, hybrid alkyd, or oil-based paint made for cabinets or trim. Check that the label approves it for spraying.
6. How many coats should you spray on kitchen cabinets?
Usually one primer coat and two thin coats of paint. Large color changes may need a third coat.
7. How far should you hold a paint sprayer from cabinets?
HVLP sprayers usually work best around 6 to 8 inches away. Airless sprayers usually work around 12 inches away. Follow your sprayer’s manual and keep the distance steady.
8. How do you avoid runs when spraying cabinets?
Spray thin coats, keep the gun moving, and never pause with the trigger pulled. Hold the right distance and spray corners lightly.
9. How do you get a smooth finish when spraying cabinets?
Prep carefully, set the correct paint thickness, test your spray pattern, overlap passes by half, and keep dust away. Light sanding between coats also helps.
10. How long should spray-painted cabinets dry before reinstalling?
Wait until the manufacturer says the paint is dry enough to handle. Then reinstall gently, since the paint will still be curing.
11. How long does spray paint take to cure on cabinets?
It depends on the paint, temperature, and humidity. Curing often takes days or weeks, much longer than drying. Check the paint label for exact times.
12. Can you spray paint laminate kitchen cabinets?
Yes, if the laminate is in good condition. Clean it well, scuff it lightly, and use a bonding primer made for slick surfaces.
13. How do you clean and maintain spray-painted cabinets?
Wipe with a soft cloth and mild soapy water, then dry. Avoid abrasive pads and harsh chemicals, and touch up chips early with leftover paint.