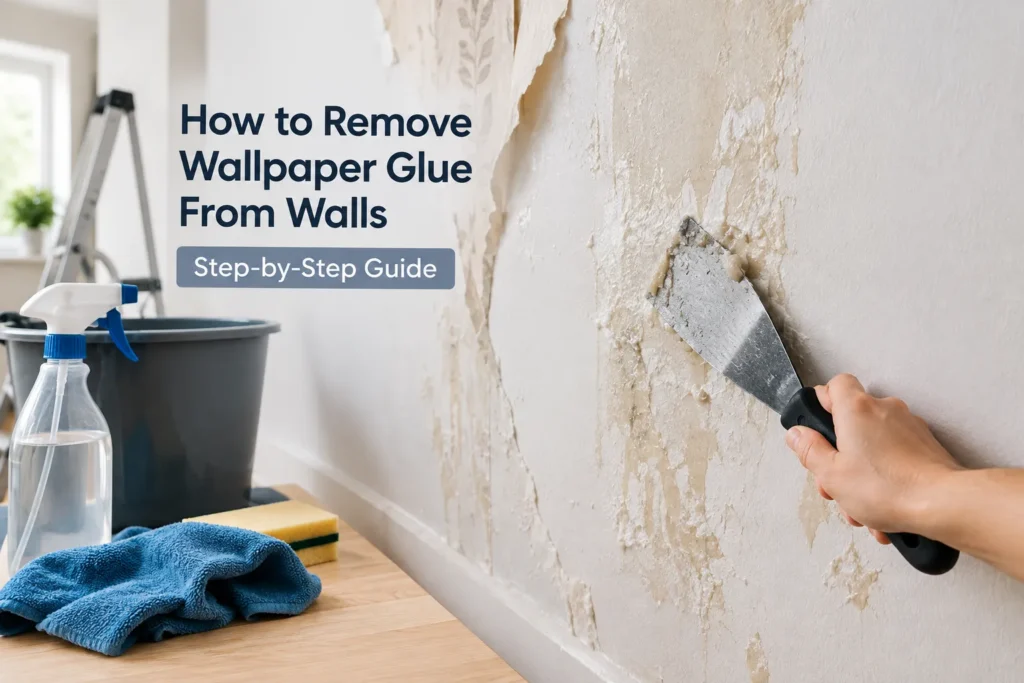
To remove wallpaper glue from walls, spray or sponge a warm solution of hot water, dish soap, and white vinegar onto a small section of wall. Let it soak for 5 to 10 minutes so the adhesive softens. Scrape the loosened paste off with a plastic scraper, scrub the area with a nylon sponge, then rinse with clean water and let the wall dry fully.
That is the short version. The long version matters, because most people fail this job on the second half, not the first.
Softening the glue is easy. Almost every solution works. Getting the softened glue to actually leave the wall is the hard part, and that comes down to your scrubbing tool, your section size, and how you check your work.
This guide by Homes Remedy walks you through the full process, including the parts that usually go wrong.
Why You Must Remove Wallpaper Glue Before Painting
Leftover wallpaper glue ruins paint jobs. Here is why.
Wallpaper paste is water soluble. Interior paint and primer both contain water. When you roll paint over dried wallpaper adhesive, the water in the paint rehydrates the glue underneath. The glue turns soft and gummy again. Your paint then sits on a moving layer instead of a solid one.
The result shows up within hours or days:
- Bubbling paint across the wall
- Peeling paint at the edges and seams
- A rough, crazed texture that no second coat will hide
- Visible wallpaper seams telegraphing through the finish
The same problem affects new wallpaper. Fresh adhesive will not bond properly to old adhesive residue, so your new paper lifts at the seams within months.
There is no shortcut around this. The glue has to come off the wall surface first.
Know Your Wall Type Before You Start
This single check saves more walls than any product on the shelf. Knock on the wall and look closely at any exposed edge.
Drywall
Drywall sounds hollow when you knock on it. It is a gypsum core wrapped in a paper facing, and that paper facing is the problem. It tears easily when wet, and once torn it fuzzes up and has to be patched.
Drywall is the most common wall surface in homes built within the last 50 years or so.
Plaster walls
Plaster sounds dull and solid. You will find it mostly in older homes. Plaster handles moisture and scrubbing far better than drywall, so you can work more aggressively. Its weakness is cracking, not tearing.
Painted walls
If the drywall was primed and painted before the wallpaper went up, you are in good shape. The paint layer acts as a barrier between your cleaning solution and the drywall paper.
The situation nobody warns you about
Sometimes builders hang wallpaper directly onto bare, unsealed drywall. No primer, no paint, no sizing.
You will know within the first minute. The drywall paper starts lifting and tearing along with the glue, and you see grey or brown gypsum underneath.
If that happens, stop wetting the wall immediately. You have three options:
- Switch to a barely damp cloth and work very gently, accepting that some tearing will occur.
- Seal the torn areas with an oil-based primer, then skim coat with joint compound and sand smooth.
- Skim coat the whole wall, which is faster than fighting it section by section on a badly damaged room.
Homeowners who ignore this sign end up needing full drywall repair. Catching it early costs you one patch instead of one room.
A note on sizing
Some installers coat walls with a thinned wallpaper paste, called sizing, before hanging paper. Sizing makes the paper easier to hang and easier to strip later.
The trade off is that sized walls carry more total adhesive. If your wallpaper peeled off suspiciously easily but the wall underneath feels rough and gritty, sizing is usually the reason. Expect more scrubbing.
Tools and Materials You Will Need
Gather everything before you start. Stopping mid wall to hunt for a sponge lets your solution dry out.
For softening the glue
- Spray bottle, or a garden pump sprayer for large rooms
- Two buckets, one for solution and one for rinsing
- Hot water, as hot as your gloves allow
- Dish soap
- White vinegar
- Commercial wallpaper adhesive remover, for tough jobs
For removing the glue
- Plastic scraper or a rounded putty knife
- Wide taping knife, 10 to 12 inches, for large flat areas
- Nylon scrub sponges, the firm kind that does not soak through
- Scouring pads
- Medium grit sanding sponge
- Microfiber cloths for the final wipe
- Paper towels
For protection and finishing
- Plastic drop cloth
- Old towels for the baseboards
- Painter’s tape
- Protective gloves
- Safety goggles
- Dust mask or respirator for sanding
- Spackle or lightweight joint compound
- Fine-grit sandpaper, 180 to 220 grit
- Stain blocking primer
Choose your sponge carefully
This is the detail almost every guide skips, and it decides whether you spend one day or three on the job.
Kitchen sponges, rags, and microfiber cloths all fail at the scrubbing stage. They absorb glue instead of lifting it, gum up within a minute, and then you are just smearing paste around the wall.
Firm nylon scrubbing sponges and scouring pads work far better. They have enough bite to break the glue film and release it when rinsed. Save the microfiber for the final wipe down, once most of the adhesive is gone.
A sanding sponge used damp is the best tool for the last stubborn film. It cuts the residue without soaking the wall.
Best Solutions for Softening Wallpaper Adhesive
All of these work. Pick based on what you have and how heavy the buildup is.
| Solution | Mix | Best for |
|---|---|---|
| Hot soapy water | 1 tablespoon dish soap per gallon of hot water | Light residue, painted walls |
| Vinegar solution | 1 cup white vinegar plus 1 tablespoon dish soap per gallon of hot water | The reliable all rounder |
| Baking soda mix | 2 tablespoons baking soda per gallon of hot water | Thick glue buildup, works as a mild abrasive |
| Fabric softener | Equal parts fabric softener and warm water | Light to medium residue, pleasant to work with |
| Commercial adhesive remover | Follow the label | Old wallpaper glue, heavy jobs, gel versions drip less |
Two points worth knowing.
Heat matters more than the recipe. Hot water softens paste faster than any additive. Keep refilling with fresh hot water as your bucket cools. A lukewarm bucket of the perfect mixture works worse than a hot bucket of plain soapy water.
Do not chase a magic product. People often work through four solutions convinced the next one will dissolve everything. The liquid is not the bottleneck. Your scrubbing tool and your patience are.
How to Remove Wallpaper Glue from Walls: Step by Step
Set aside one full day for an average bedroom. A heavily papered room may take two.
Step 1: Prepare and protect the room
Clear the room of furniture. Cover anything that stays with plastic sheeting.
Lay old towels along the baseboards first, then plastic drop cloths over them, taped down. The towels catch drips that plastic alone would let pool.
Step 2: Protect the electrics
Turn off power to the room at the breaker box. If you cannot, cover every outlet and switch with painter’s tape or plastic wrap and seal the edges.
You will be spraying liquid onto walls that contain wiring. Do not skip this.
Step 3: Mix your solution
Fill one bucket with your chosen hot solution. Fill a second bucket with clean hot water for rinsing sponges.
The two bucket system matters. If you rinse a glue loaded sponge into your working solution, you are spreading old paste back onto the wall with every pass.
Step 4: Work in small sections
Divide the wall into sections of roughly 4 by 4 feet. Do not exceed 5 by 5 feet.
Larger sections dry out before you reach them, and dried solution does nothing. Smaller sections keep the glue workable the whole time.
Start at the top of the wall and work down. Runoff then flows over areas you have not cleaned yet, which gives them a head start rather than re contaminating finished work.
Step 5: Soak the glue
Spray or sponge the solution generously onto your section. For large rooms, load a paint roller with the solution and roll it on. It covers far faster than a sponge, and rolling upward keeps foam from flying off.
Let it soak 5 to 10 minutes. Keep the section damp the whole time. Mist it again if it starts drying.
Test with a fingernail. Softened glue feels slippery and lifts slightly. Hard glue means it needs more time or hotter solution.
Step 6: Scrape off the bulk
Hold a plastic scraper at a low angle, around 30 degrees. Press just hard enough that the blade flexes slightly, then push forward and slide it under the softened paste.
Never jab the blade into the wall. That is how gouges happen, and gouges mean patching later.
On large flat areas, a wide taping knife held with both hands lets you shave off softened paste in long passes. This is what professional decorators do, and it is much faster than sponging alone.
Wipe the scraped goo onto a paper towel and bin it as you go. Do not let it build up on the drop cloth where you will step in it.
Step 7: Scrub what is left
Re spray the section. Scrub with a nylon sponge in small circles.
Follow with a damp sanding sponge for any remaining film. Work gently on drywall and more firmly on plaster.
Rinse your sponge in the clean water bucket often. A loaded sponge cleans nothing.
Step 8: Rinse and wipe
Wipe the section with a clean microfiber cloth and clean water. This lifts the last of the loosened adhesive residue and removes soap film that would interfere with primer.
Change to a fresh cloth as soon as one feels slimy.
Step 9: Repeat across the wall
Move to the next section and repeat. Overlap slightly at the edges so you do not leave a strip of untouched glue between sections.
Finish one full wall before moving on. It gives you a clear reference point and a small win.
Step 10: Let the walls dry
Open windows and run a fan. Let the walls air dry completely for at least 24 hours.
Do not sand, patch, or prime a damp wall. Trapped moisture causes primer to blister and hides glue you would otherwise spot.
How to Remove Dried or Stubborn Wallpaper Glue
Some walls resist everything. Usually that means old wallpaper glue, several layers of paste, or a strong adhesive under vinyl wallpaper.
Work through these in order.
Extend the soak time. Most failures come from impatience. Spray the section, wait 10 minutes, then spray again without scrubbing in between. Give hardened glue 15 to 20 minutes of continuous dampness before you touch it.
Raise the temperature. Refresh your bucket with genuinely hot water. Heat does more for stubborn adhesive than any additive.
Switch to a commercial remover. Wallpaper strippers use enzymes or surfactants that break down paste faster than home mixtures. Gel formulas cling to the wall instead of running down it, which keeps the glue wet longer. Follow the product instructions exactly and ventilate the room.
Add mild abrasion. Dip a damp cloth in dry baking soda and rub the area. The mild grit helps break the glue film without cutting the wall.
Reapply and repeat. Two moderate passes beat one aggressive pass every time. Aggressive scraping damages drywall far more often than it removes glue.
If the wall still feels sticky
Here is something worth knowing before you panic. Walls often feel tacky when you rewet them even after the glue is gone. You are reactivating microscopic traces of old paste that soaked into the surface.
A wall that feels slightly tacky when wet but smooth and non sticky when fully dry is usually fine. A stain blocking primer will seal whatever trace remains.
A wall that still feels gritty, hazy, or gummy when dry needs another pass.
Alternative Removal Methods
Steam removal
A wallpaper steamer or steam stripper softens paste faster than any liquid. Heat and moisture penetrate together, which is why many people find steam works when soaking failed.
Hold the steam pad against the wall for about 30 seconds, then scrape the softened glue immediately while it is hot. Work in small areas and keep moving.
You can rent a steamer rather than buy one. Wear gloves and goggles, because escaping steam causes burns easily. Steam also puts a lot of moisture into drywall, so do not linger in one spot.
Heat gun
A heat gun softens glue with dry heat instead of moisture, which suits delicate wall surfaces where you want to avoid oversaturating drywall.
Hold it about 6 inches from the wall, keep it moving constantly, and scrape as you go. Never hold it still. Heat guns scorch drywall paper and can ignite debris.
Dry sanding
Sanding removes dried adhesive as powder with no gooey mess. It is fast on small areas.
Two cautions apply. First, it creates a lot of airborne dust, so wear a respirator and seal off the room. Second, if your home was built before 1978 or the paper was hung before the 1990s, do not dry sand until you have tested for lead and asbestos. Wetting the wall is the safer default in old houses.
Use sanding for spot work, not for a whole room.
Wall liner and skim coating
If a wall is badly damaged or the residue simply will not come off, two fallback options exist.
Lining paper hung over the wall gives you a fresh smooth surface to paint. Skim coating with joint compound does the same thing with mud instead of paper. Both are common professional solutions and neither is an admission of defeat.
How to Know All the Wallpaper Glue Is Removed
Most guides say to run your hand over the wall. That test alone misses plenty. Use all four of these.
- The raking light test. Hold a work light or phone torch flat against the wall so the beam skims across the surface. Remaining glue shows up as hazy, shiny, or slightly fuzzy patches that are invisible under normal lighting. This is the single most useful check.
- The touch test. Run a dry hand across the dry wall. Glue feels rough, gritty, or slightly raised compared to clean wall.
- The water mist test. Lightly mist a small area and wait a minute. Real glue residue turns slippery and tacky. Clean wall just feels wet.
- The primer test. This is the definitive one. Apply primer to a section and watch it dry. Wherever primer bubbles, crawls, or dries unevenly, glue remains underneath. Scrape those spots, clean them, and prime again.
That last test is useful enough to build into your process. Prime one wall first, note where it reacts, then fix those areas before priming the rest.
Sanding, Patching, and Repairing the Wall
Once the wall is clean and fully dry, prepare the surface properly.
Sand the wall lightly. Use a 180 to 220 grit sanding sponge or a drywall sanding pad on a pole. Work in light circles. You are smoothing the surface and catching any last residual adhesive, not removing material.
Fill the damage. Apply spackle or lightweight joint compound to gouges, scratches, torn drywall paper, and any nail holes. Slightly overfill, because compound shrinks as it dries.
Sand the patches. Once dry, sand patched areas flush with fine-grit sandpaper. Feather the edges so no ridge remains.
Remove sanding dust completely. Vacuum the walls with a brush attachment, then wipe with a barely damp microfiber cloth. Let the wall dry again.
Dust is the most common cause of primer adhesion failure after wallpaper removal, and it is entirely avoidable.
Priming and Painting After Wallpaper Removal
Never paint directly onto a wall that held wallpaper. Always prime first.
Choose the right primer
Use a stain blocking or oil-based primer, not a general purpose water-based one.
The reason is simple. Water-based primer contains enough water to reactivate any trace adhesive you missed, which causes bubbling. An oil-based or shellac based primer seals that residue instead of waking it up. It also blocks old wallpaper stains and gives paint a uniform surface to grip.
Products designed to seal porous or compromised surfaces after wallpaper removal work especially well here.
Application tips that prevent problems
Lay the primer down and leave it alone. Do not go back over a section that has started to set, and do not cut in next to wet primer. Rolling back into tacky primer pulls it off the wall along with any glue it had bonded to. Apply, move on, let it dry.
Apply two thin coats rather than one thick one. Thin coats dry evenly and seal better.
Expect the first coat to reveal flaws. Primer highlights every patch, ridge, and missed glue spot. That is useful, not discouraging. Fix what it shows, then apply the second coat.
Let primer cure fully before painting, usually at least 4 hours and ideally overnight. Then paint normally.
Safety Precautions
- Test old homes first. Homes built before 1978 may contain lead paint under the wallpaper. Adhesives installed before the 1990s can contain asbestos. Test kits are inexpensive. Disturbing either material without knowing is the real risk, not the wallpaper itself.
- Keep water away from electricity. Turn off power to the room or seal every outlet and switch.
- Wear protective gloves. Hot solutions and chemical strippers both irritate skin.
- Wear safety goggles. Solution drips down from above constantly when you work on upper walls.
- Wear a dust mask or respirator when sanding. Old adhesive dust is not something to breathe.
- Ventilate the room. Open windows and run a fan, especially with chemical adhesive removers.
- Follow chemical product instructions. Never mix a commercial stripper with household cleaners.
- Do not pour glue water down the sink. Dissolved paste can set in your drain. Dispose of it outside or in a waste container.
- Use ladders safely. Reposition the ladder rather than stretching sideways with a wet sponge in hand.
Common Mistakes to Avoid
- Working in sections that are too large. The solution dries before you reach it and the whole soak is wasted.
- Using metal scrapers aggressively on drywall. Plastic scrapers and rounded putty knives do the same job without gouging.
- Rinsing a dirty sponge into the working solution. Use two buckets.
- Giving up on the soak too early. Most stubborn glue is simply under soaked glue.
- Skipping the rinse. Soap film left on the wall interferes with primer adhesion.
- Priming a damp wall. Wait the full 24 hours.
- Painting without primer. This undoes the entire job.
- Oversaturating drywall. Damp is the goal, soaked is not. Soaked drywall swells and the paper facing delaminates.
How Long Does It Take?
Plan realistically so you do not rush the important parts.
- Average bedroom, light residue: 4 to 6 hours of cleaning, plus drying time
- Average bedroom, heavy or old glue: 1 to 2 full days
- Whole house: budget several weekends
Add 24 hours of drying, a few hours for patching and sanding, and another day for priming and painting. The cleaning is the long part. Everything after it moves quickly.
Frequently Asked Questions
What is the easiest way to remove wallpaper glue?
Hot water mixed with dish soap and white vinegar, applied with a spray bottle or roller, left to soak for several minutes, then scrubbed with a nylon sponge. It costs almost nothing and works on most walls. A wallpaper steamer is faster on heavy buildup if you have access to one.
Can vinegar remove wallpaper glue?
Yes. The mild acid in white vinegar helps break down wallpaper paste. Mix roughly one cup of vinegar per gallon of hot water. Vinegar on its own is less effective than vinegar combined with dish soap and hot water.
Can dish soap remove wallpaper glue?
Yes. Dish soap acts as a surfactant, helping water penetrate and lift the adhesive. A tablespoon per gallon of hot water is enough. It handles light residue well and works better on heavy residue when combined with vinegar.
Can fabric softener remove wallpaper glue?
Yes. Mix equal parts liquid fabric softener and warm water in a spray bottle. It softens paste effectively and smells better than vinegar. It performs best on light to medium residue rather than thick glue buildup.
How do you remove dried wallpaper glue?
Rewet it thoroughly and give it time. Spray the area, wait 10 minutes, spray again, then scrape. Dried wallpaper adhesive needs a longer soak than fresh residue. If it resists, switch to a commercial adhesive remover or use steam.
Can you sand wallpaper glue off?
Yes, but only as a supporting method. Dry sanding removes hardened glue as powder and works well for small areas. Wear a respirator, seal the room, and test for lead and asbestos first in older homes. Sanding an entire room creates a large amount of hazardous dust.
Can you paint over wallpaper glue?
No. Water in the paint reactivates the adhesive, causing bubbling, peeling, and a crazed texture. Even a thin film of leftover glue will show. Remove the glue, then seal the wall with an oil-based primer.
Do you need to prime after removing wallpaper?
Yes, always. Primer seals any residual adhesive, blocks old stains, evens out the porosity of patched areas, and gives paint something reliable to grip. An oil-based or stain blocking primer is the right choice here.
How long should walls dry after wallpaper removal?
At least 24 hours. Open windows and run a fan to speed it up. In humid conditions or on heavily soaked walls, allow 48 hours. Sanding or priming a damp wall causes blistering.
How do you know all the wallpaper glue is removed?
Shine a light across the wall at a sharp angle and look for hazy or shiny patches. Run a dry hand over the surface and feel for grit. Mist a test area and check for slipperiness. Finally, prime a section and watch for bubbling, which reveals any glue you missed.
How do you remove wallpaper glue without damaging drywall?
Work in small sections, use a plastic scraper at a low angle, keep the wall damp rather than soaked, and never force the blade. If the drywall facing starts tearing, stop wetting that area, let it dry, seal it with oil-based primer, then patch and sand.
What is the best wallpaper glue remover?
For most homes, hot water with dish soap and vinegar removes the glue perfectly well. For thick or old adhesive, a commercial wallpaper stripper in gel form clings to the wall longer and works faster. The solution matters less than your scrubbing tool and soak time.
How do you remove wallpaper glue from plaster walls?
Use the same method, but you can work more firmly. Plaster tolerates moisture and scrubbing far better than drywall. Watch for existing cracks, since heavy water can seep into them. Fill any cracks after the wall dries.
Does the wall have to be perfectly smooth before painting?
It needs to be smooth and clean, not flawless. Run your hand over the dry wall. If you feel raised grit or rough patches, sand them. Minor imperfections disappear under primer and two coats of paint. Glue residue does not.
Final Checklist Before You Paint
Work through this list before opening a can of primer.
- All visible glue residue removed from every wall
- Walls rinsed with clean water
- Wall completely dry for at least 24 hours
- Raking light check done on every wall
- Gouges and torn areas patched and sanded
- Sanding dust vacuumed and wiped away
- Outlets still covered and power handled safely
- Stain blocking primer ready
Removing wallpaper glue is tedious work, not difficult work. The people who get great results are not using a secret product. They are soaking properly, working in small sections, using the right sponge, and checking their walls before they paint instead of after.
Do those four things and your walls will take paint beautifully.