| Project detail | What to expect |
|---|---|
| Time needed | 2 to 3 hours for a first install |
| Skill level | Beginner to intermediate |
| People needed | 2 (3 for screens over 70 inches) |
| Typical cost | $25 to $150 for the mount, plus anchors if needed |
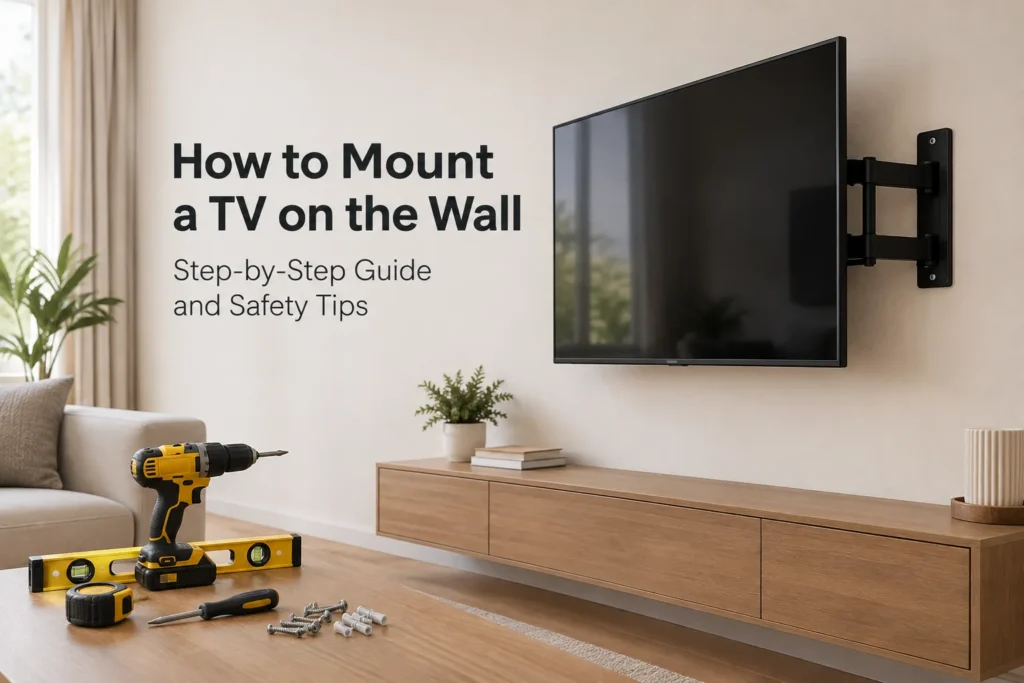
A wall-mounted TV frees up floor space and fixes bad viewing angles. It also removes the tip-over risk of a TV sitting on furniture. The job is not hard, but it is unforgiving. A bracket fixed to drywall alone can pull out months later and take your TV down with it.
This guide by Homes Remedy walks through the full process in order, from picking the mount to testing wall stability. It covers wood studs, concrete, brick, plaster, and hollow drywall, plus the electrical safety steps most guides skip.
Four Facts to Gather Before You Buy Anything
Every decision in this project comes back to four numbers. Write them down first.
Your TV weight. Check the manual or the manufacturer’s website. Do not guess from screen size. Two 65-inch TVs can differ by 20 pounds.
Your VESA pattern. This is the spacing between the four threaded holes on the back of your TV, measured in millimetres. Common patterns are 100×100, 200×200, 400×400, and 600×400.
Your wall type. Drywall over wood studs, concrete, brick, plaster and lath, or metal studs. Each one needs different fixings.
Your seated eye height. Sit where you actually watch TV. Measure from the floor to your eyes. Most people land between 38 and 45 inches.
Tools and Materials Checklist
Tools
- Electronic stud finder
- Power drill and drill bits
- Socket wrench or ratchet set
- Phillips screwdriver
- Spirit level, 24 inches or longer
- Tape measure
- Pencil and painter’s tape
- Non-contact voltage tester
- Safety glasses
Add for masonry walls
- Hammer drill
- Masonry drill bits sized to your anchors
- Sleeve anchors or wedge anchors rated for your TV weight
Add for hollow drywall
- Toggle bolts or snap toggles
- Drywall saw, only if you plan an in-wall cable kit
Materials
- TV wall mount with its supplied screws, washers, and spacers
- Cable raceway or a UL-listed in-wall power kit
- In-wall rated HDMI cable marked CL2 or CL3, if you run cables inside the wall
Mount a TV on the Wall | 11 Easy Steps
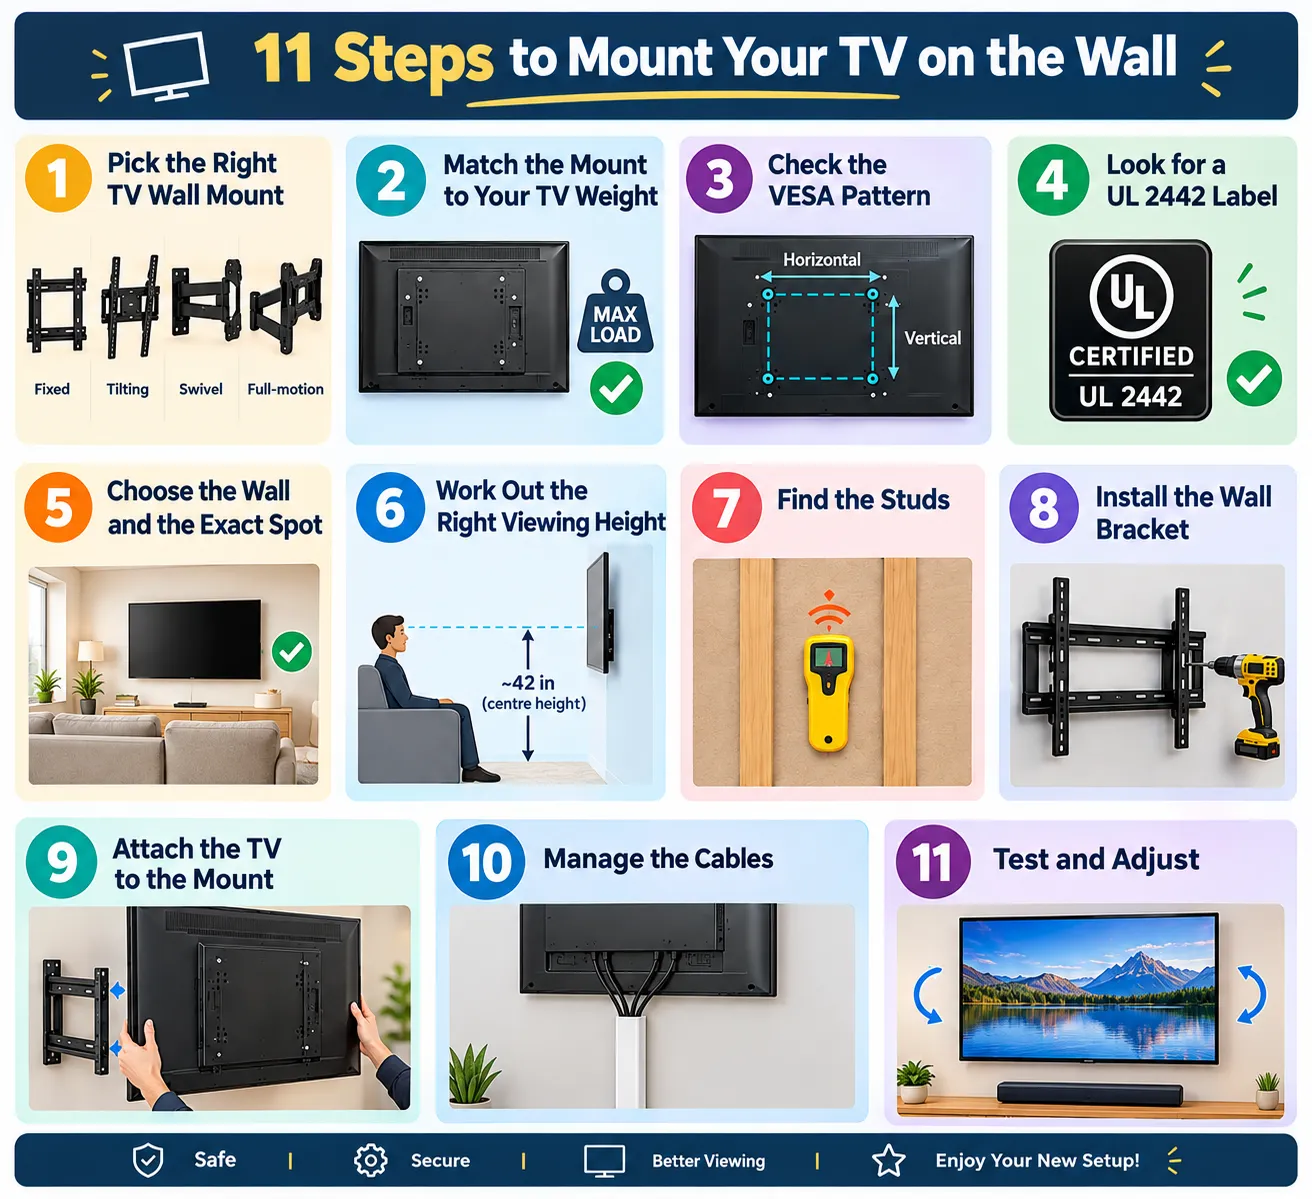
Step 1: Pick the Right TV Wall Mount
Compare the four mount types
| Mount type | Best for | Movement | Sits from wall | Needs studs? |
|---|---|---|---|---|
| Fixed | One main seating spot, clean flat look | None | 1 to 2 inches | Preferred |
| Tilting | Screens above eye level, glare from windows | Tilts up and down, usually 5 to 15 degrees | 2 to 3 inches | Preferred |
| Swivel | Corners, or watching from a second room | Pivots left and right | 3 to 5 inches | Yes |
| Full-motion | Open-plan rooms, kitchen and sofa viewing | Tilts, swivels, extends, retracts | 2 to 22 inches | Yes, always |
Fixed mounts cost the least and stay closest to the wall. Full-motion mounts give the most freedom but need the strongest fixing.
Match the mount to your TV weight
Every mount lists a maximum load. Pick one rated above your TV weight, not level with it. A margin of 25 percent or more gives you room for a soundbar bracket or a heavier replacement TV later.
Weight matters more with full-motion mounts. An extended arm works like a lever. The further the TV sits from the wall, the harder it pulls on the screws. This is why almost no full-motion mount is approved for drywall anchors alone.
Check the VESA pattern
Measure the distance between the mounting holes on the back of your TV, both across and down. A mount listed as “200/300/400” fits several patterns, so most brackets cover a range.
The screws matter too. TVs use metric screws, usually M4, M6, or M8. Larger screens normally take M8. Your mount kit should include the right sizes, along with washers and plastic spacers.
Look for a UL 2442 label
UL 2442 is the independent safety standard for wall and ceiling mounts. To pass it, a mount holding a TV under 100 pounds must survive testing at four times its advertised capacity. A mount carrying this listing has been tested by a third party rather than rated by the seller.
Step 2: Choose the Wall and the Exact Spot
Pick the wall before you pick the height. Some walls make the rest of the job much harder.
Watch the light. Sit in your usual spot at the time you normally watch TV. Look for sunlight and lamp reflections on the wall you have in mind. If you cannot avoid glare, plan for a tilting or swivel mount.
Avoid exterior walls if you want hidden cables. Outside walls carry insulation, extra bracing, and fire blocking. Dropping a cable through one is far harder than through an interior wall.
Stay near an outlet. A shorter cable run means less concealment work.
Check port access. Leave room to reach the HDMI and power ports once the TV is up. Side-facing ports are easier than rear-facing ones on a flat mount.
Skip walls that shake. A wall shared with a slamming door or a laundry machine will loosen fixings over time.
Step 3: Work Out the Right Viewing Height
Mounting too high is the most common mistake people make. It looks fine on day one and causes neck strain for years.
Use your own eye height, not a fixed number
The centre of the screen should sit level with your eyes when you are seated. For most sofas that means roughly 42 inches from the floor, but your own measurement beats the average.
To find where the bottom edge lands, use this:
Bottom of screen = centre height − (screen height ÷ 2)
Screen height by TV size
Screen height is not the same as the diagonal size. For a standard 16:9 TV, the picture area is just under half the diagonal measurement.
| TV size (diagonal) | Screen height | Bottom edge if centre sits at 42 in |
|---|---|---|
| 43 inches | 21 inches | 31.5 inches |
| 50 inches | 24.5 inches | 29.75 inches |
| 55 inches | 27 inches | 28.5 inches |
| 65 inches | 32 inches | 26 inches |
| 75 inches | 37 inches | 23.5 inches |
| 85 inches | 42 inches | 21 inches |
Add an inch or so for the frame around the picture.
Here is why this table matters. Put a 75-inch TV at the standard 42-inch centre and the bottom edge sits around 23 inches off the floor. A media console 24 inches tall will not fit underneath. Larger screens often need a slightly higher centre point, and then a tilting mount to aim the picture back down at you.
Check the viewing distance too
For a 4K TV, sit about 1 to 1.5 times the screen diagonal away. A 65-inch TV suits a seating distance of roughly 5.5 to 8 feet.
Test it with a cardboard cutout
Cut a piece of cardboard to your screen size. Tape it to the wall. Sit down and look at it. Move it up and down until it feels natural. Mark the spot you like. Five minutes here saves you from drilling twice.
The cutout also shows you whether the TV looks better centred on the wall or centred on the sofa. The two are rarely the same.
Think twice about mounting above a fireplace
It looks good in photos and causes two real problems. The screen sits too high for comfortable viewing. Heat and smoke from the firebox also shorten the life of the panel. Most TVs specify a maximum operating temperature, and the space above a working fireplace can pass it.
If you go ahead anyway, use a pull-down fireplace mount. It lowers the screen to eye level while you watch and lifts it back afterwards.
Step 4: Check What Your Wall Is Made Of
Knock on the wall. A hollow sound usually means drywall or plaster over a frame. A solid, dull sound points to masonry.
Drywall over wood studs
The most common wall in modern homes. Drywall is typically half an inch thick and has almost no holding strength on its own. The vertical wood studs behind it do the work.
Studs usually sit 16 inches apart, measured centre to centre, though some homes use 24-inch spacing. Your wall plate should span at least two studs.
Concrete, brick, and hollow block
Solid masonry holds a TV very well. You need a hammer drill and masonry bits sized to your anchors.
Use sleeve anchors or wedge anchors rated for your TV weight. Plastic wall plugs are not strong enough for a TV. Drill into the solid face of the brick rather than the mortar joint, unless your anchor instructions say otherwise. Clear the dust out of each hole before you set the anchor, because dust stops it gripping.
Hollow block is different from solid brick. It has voids inside. Check that your anchor is rated for hollow masonry, or use a toggle designed for block.
Plaster and lath
Older homes often have plaster over thin wood strips called lath. Plaster cracks easily. Drill slowly and use painter’s tape over the spot to reduce chipping. Your screws need to pass through the plaster and lath and still bite at least 1.5 inches into the stud behind, so they will be longer than standard. Old plaster walls also tend to hide old wiring, so the checks in Step 6 matter more here.
Metal studs
Common in apartments and newer builds. Metal studs are thin hollow channels. Lag bolts will not hold in them.
Use toggle bolts or snap toggles rated for metal studs. Keep to fixed or tilting mounts and lighter screens. A full-motion mount on metal studs needs a plywood backer board fixed across several studs, or a professional install.
If you cannot tell what the wall is
Stop and find out before drilling. Drill one small test hole in a low, hidden spot and look at the dust. White powder points to drywall or plaster. Grey grit points to concrete. Red dust points to brick.
Step 5: Find and Mark the Wall Studs
Use the stud finder properly
- Hold the stud finder flat against the wall.
- Press and hold the calibrate button until it signals ready. This sets a baseline for your wall.
- Slide it slowly sideways. Mark the point where it first signals. That is one edge of the stud.
- Keep sliding until the signal stops, then come back from the other side and mark the second edge.
- The centre of the stud sits halfway between your two marks.
Aim for that centre. A screw driven into the edge of a stud grips far less wood and can split it.
Confirm you found solid wood
Stud finders react to pipes and wiring as well as timber. Use at least one of these checks:
- Magnet test. Slide a strong magnet across the wall. It sticks to the drywall screws, which run down the centre of the stud.
- Finish nail test. Tap a thin finish nail through the drywall at your mark. Solid resistance means wood. The hole is tiny and easy to fill.
- Spacing test. Measure 16 inches from a stud you have confirmed. Another stud should appear there.
When the studs are in the wrong place
Studs rarely line up with the centre of your wall. You have three good options.
- Use the slots. Most wall plates have long horizontal slots. Bolt into the off-centre studs, then slide the TV along the rail to centre it.
- Fit a plywood backer. Screw a piece of three-quarter-inch plywood across two or more studs. Mount the bracket anywhere on the plywood. This is the strongest fix for awkward stud positions.
- Use a full-motion mount. The arm lets you pull the screen across to where you want it.
Step 6: Make the Wall Safe Before You Drill
This step takes ten minutes and prevents the worst outcomes of the whole project.
Turn off the breaker. Switch off the circuit that feeds any outlet or switch on that wall. If you are not sure which breaker it is, turn off the outlets and lights on that whole side of the room.
Test before you cut. Hold a non-contact voltage tester against the wall near your drill points. Test it on a live outlet first so you know it works.
Look for clues. Outlets, light switches, and plumbing fixtures tell you where services run. Wiring often runs vertically above and below an outlet, and horizontally between outlets. Avoid drilling directly above or below one. Bathrooms and kitchens on the other side of the wall mean pipes.
Drill shallow first. Set your drill to go in about an inch. Stop and check the hole before going deeper. Sudden loss of resistance means you have hit a cavity, not a stud.
Wear safety glasses. Masonry drilling throws grit, and drywall dust irritates eyes.
If you hit a pipe, a wire, or a heating duct, stop the job and call a professional.
Step 7: Attach the Mounting Bracket to the TV
Lay the TV face down on a blanket or towel on a flat surface. Keep it away from foot traffic and away from table edges.
- Line up the bracket arms with the VESA holes on the back of the panel.
- Hand-thread each screw first. If it does not start easily by hand, it is the wrong size. Never force it.
- If a screw bottoms out before the bracket pulls tight, add the plastic spacers from the kit. TVs with curved or recessed backs almost always need spacers.
- Fit the washers where the instructions show them.
- Tighten with a screwdriver until snug, then stop.
Two warnings here. Use only the hardware supplied with the mount. A screw that is too long can push into the panel and cause permanent damage. And if you bought a tilting or swivel mount, check that the bracket screws do not block the moving parts. Most brackets offer a second set of holes if they do.
Step 8: Fix the Wall Plate to the Wall
Into wood studs
- Hold the plate at your marked height. Rest the level on top and adjust until the bubble centres.
- Mark the drill points through the holes in the plate.
- Drill pilot holes at each mark, using the bit size given in your manual. Pilot holes stop the wood splitting and keep the bolt straight.
- Drive the lag bolts through the plate into the studs with a socket wrench. Most mounts call for bolts that bite at least 1.5 inches into solid wood.
- Tighten until the plate sits firm and flat against the wall, then stop.
Do not over-tighten. Too much force strips the wood inside the stud, crushes the drywall behind the plate, or bends the plate itself. Firm and flat is the target.
Check the level one final time before you move on.
Into concrete or brick
- Mark your holes with the plate levelled against the wall.
- Drill with a hammer drill and a masonry bit matched to your anchor size. Drill slightly deeper than the anchor length.
- Blow or vacuum the dust out of every hole.
- Insert the sleeve or wedge anchors and set them to the depth given in the anchor instructions.
- Bolt the plate on and tighten evenly across all fixings.
Into drywall with no studs
Only use this route for a fixed or tilting mount on a lighter TV. Never hang a full-motion mount on drywall anchors. Check the rating printed on the toggle bolt packet and keep the combined weight of TV, mount, and any attached devices well below it.
- Level the plate and mark the holes. Make sure your marks clear the studs. Toggle bolts need about 2 inches of open cavity behind the drywall to open properly.
- Check the toggle bolt packet for the correct hole size. This is the width of the folded wing unit, not the width of the bolt. It is the mistake most people make.
- Drill the holes.
- Push each bolt through the plate from the room side, then thread the wing unit onto the back of the bolt by four or five turns. The open side of the wing faces the room.
- Pinch the wings closed and push each one through its hole. You will hear a click as the wings spring open inside the cavity.
- Have your helper pull the plate towards the room while you tighten each bolt. Tell them to move their fingers clear before the plate reaches the wall.
- Re-check the level. The oversized holes let the plate shift while you tighten, so this check is not optional. Loosen and reposition if the bubble has moved.
Step 9: Connect the Cables, Then Hang the TV
Plug in first
Connect the HDMI, power, and any audio cables before the TV goes on the wall. Reaching behind a mounted screen is awkward, and on a flat mount it is close to impossible. Leave a little slack so a tilt or swivel mount can still move freely.
Lift it safely
Anything over 32 inches is a two-person job. Screens over 70 inches usually need three people.
Each person holds the TV by the sides of the frame. Never grip the top and bottom edges, and never press on the panel itself.
Lock it on
Lift the TV and hook the bracket arms onto the wall plate. On most mounts the top edge hooks over the top rail first, then the bottom swings in.
Every mount has a locking feature. It is usually a pair of screws at the bottom of the arms, a spring clip that clicks, or a pull string. Engage it and check it by hand. Do not assume it caught.
Step 10: Test Wall Stability and Level
Three checks, in this order.
The wobble test. Put both hands on the lower corners of the TV. Pull gently forward, then push side to side. The TV and the wall plate should move as one solid piece. Any play at the wall plate means a fixing is not biting. Take the TV down and find out why.
The level check. Rest the spirit level on top of the TV. Most mounts include a fine-adjustment screw for small corrections, so you rarely need to redrill.
The tension check. On a tilting or full-motion mount, test the movement. If the screen drifts downwards on its own, tighten the tension bolts slightly. If it takes real force to move, loosen them slightly. Aim for smooth movement that holds its position.
Step 11: Finish the Cable Management
Surface raceways
A raceway is a paintable plastic channel that sticks to the wall. Cables sit inside and a cover snaps on. This suits renters, masonry walls, and anyone who does not want to cut drywall.
Sand the raceway lightly, prime it, then paint it to match your wall. Done properly it disappears from a few feet away.
In-wall kits
A UL-listed in-wall power kit gives the cleanest result. It uses two recessed boxes, one behind the TV and one near an existing outlet, joined by wiring rated for use inside a wall. This type of listed assembly is the recognised way to feed a new receptacle from an existing one without running a cord through the wall.
While the wall is open, pull an extra HDMI cable and an Ethernet cable through. It costs very little now and saves reopening the wall when you add a console or soundbar.
Two rules for anything inside a wall
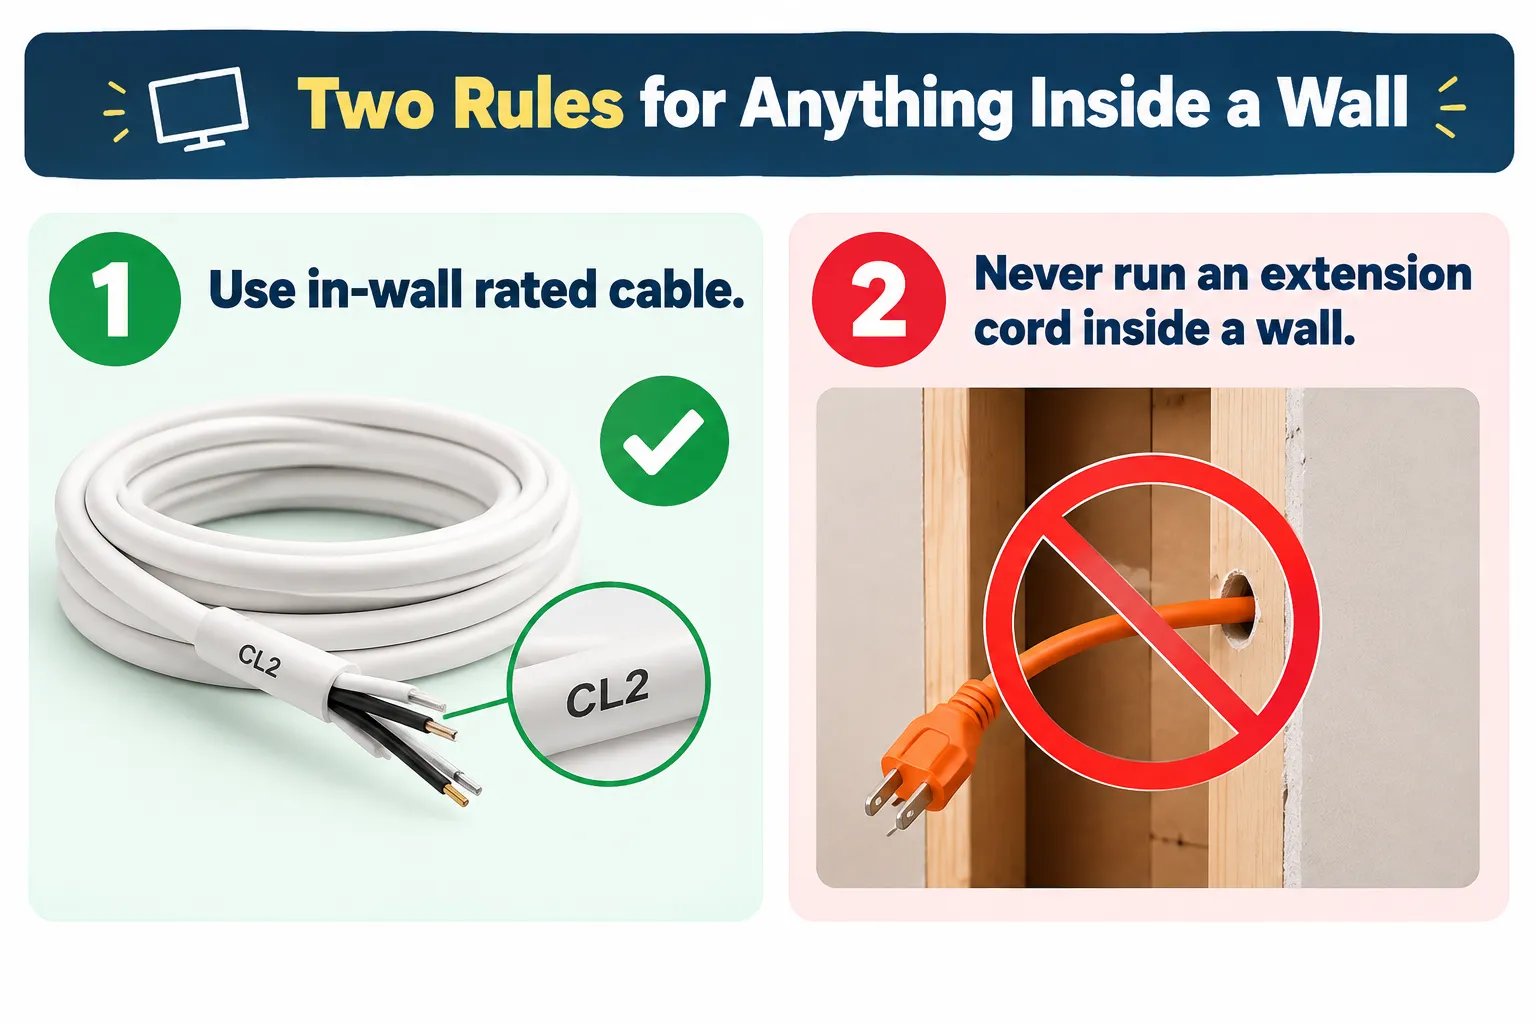
Use in-wall rated cable. Look for CL2 or CL3 printed on the jacket. These ratings come from Article 725 of the National Electrical Code and describe how the cable jacket resists fire. Standard PVC cable jackets can spread flames and release toxic fumes inside a wall cavity. CL2 is rated to 150 volts and CL3 to 300 volts. CL2 is enough for HDMI.
Never run an extension cord inside a wall. This is the single most common electrical mistake in DIY TV installs. The National Electrical Code prohibits extension cords and power supply cords from being run through holes in walls or concealed by walls. It also bars using them as a substitute for a building’s fixed wiring. Use a listed in-wall power kit or have an electrician fit a proper outlet behind the TV.
10 Common Mistakes and How to Avoid Them
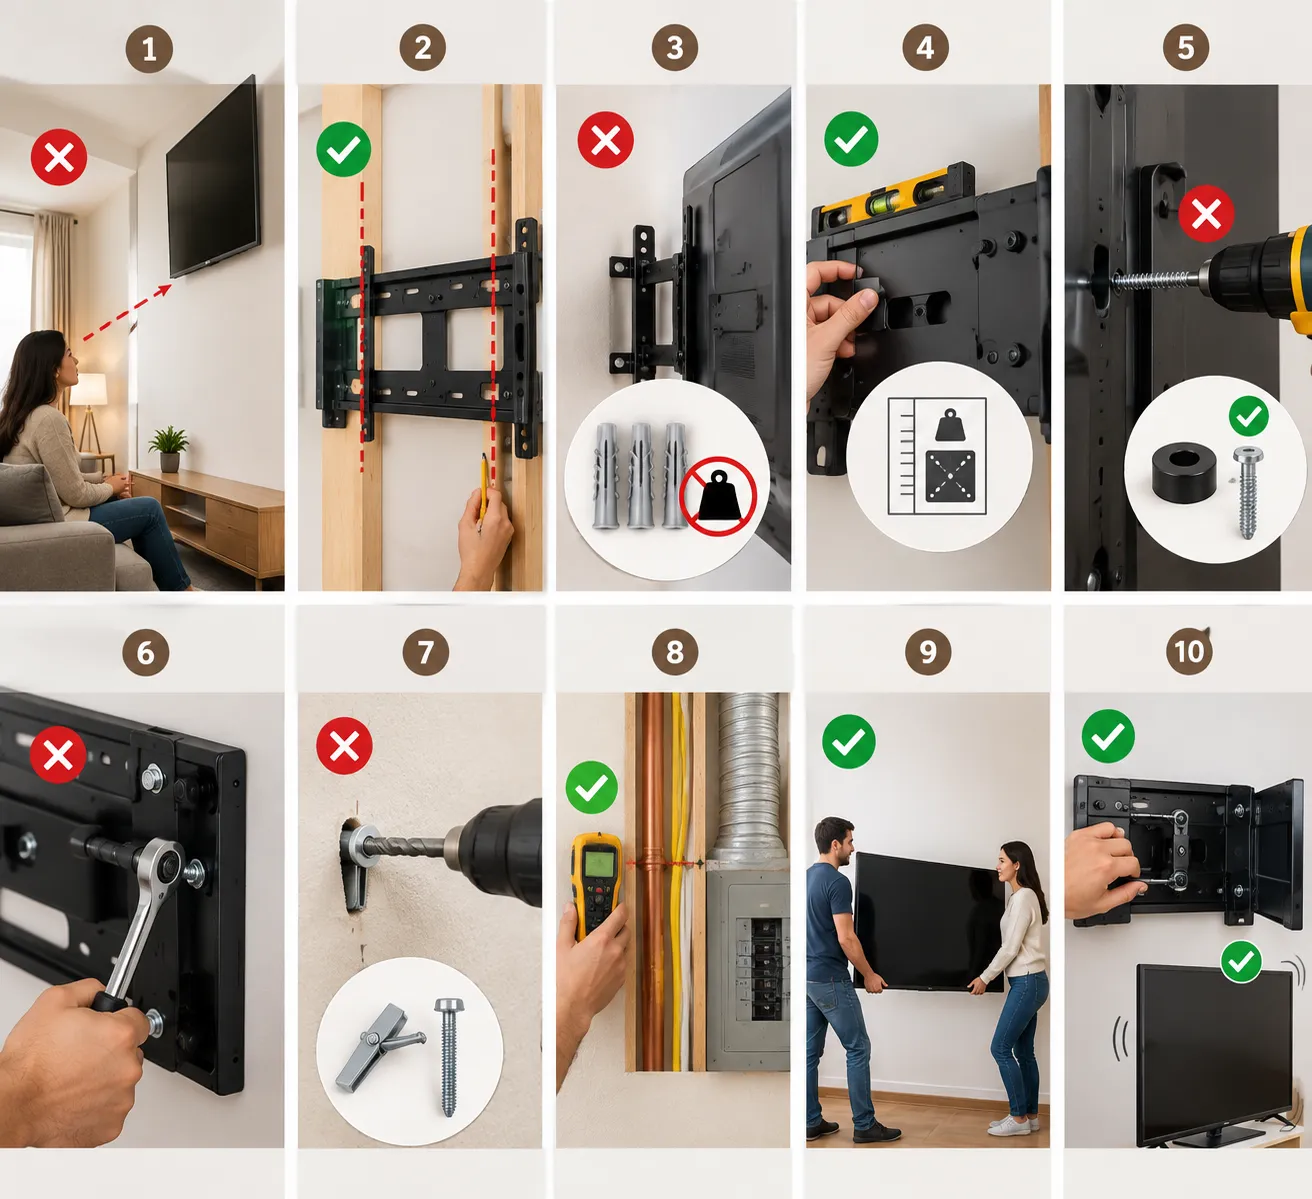
- Mounting too high. Use your seated eye height and test with a cardboard cutout first.
- Hitting the stud edge. Mark both edges and drill into the centre.
- Trusting drywall anchors with a heavy screen. Studs, masonry, or a plywood backer are the only safe options for large TVs and all full-motion mounts.
- Buying the mount before checking weight and VESA. Confirm both numbers first.
- Using screws that are too long. Add the supplied spacers instead of forcing a longer screw into the panel.
- Over-tightening lag bolts. Stop when the plate is firm against the wall.
- Drilling toggle holes to bolt size. Size the hole to the folded wing, not the bolt.
- Drilling blind. Turn off the breaker and check for wiring, pipes, and ducts.
- Lifting alone. Two people minimum over 32 inches.
- Skipping the locks and the wobble test. These are the two checks that keep the TV on the wall.
Keeping the Installation Safe Long Term
Fixings settle. Wood moves with seasonal humidity. Moving parts loosen with use.
- Re-check the bolts two weeks after installation, then every six months
- Repeat the wobble test each time
- Check the tension on a full-motion arm more often if you move it daily
- Keep climbable furniture away from directly beneath the screen
- Tuck loose cords out of reach so a child or pet cannot pull on them
- Re-check the mount rating before you replace the TV with a heavier model
Mounting removes the tip-over risk that comes from a TV on a stand. A loose mount replaces it with a new one, so these checks matter.
Frequently Asked Questions
How long does it take to mount a TV?
Allow 2 to 3 hours for your first install on a drywall and stud wall. Masonry walls and in-wall cable kits add an hour or more. A second install usually takes under an hour.
Will mounting a TV damage my wall?
You will leave four to six bolt holes. On drywall these fill with filler and a dab of paint in about twenty minutes. Toggle bolts leave larger holes, around half an inch, which need a patch before filling. Small marking mistakes rarely matter because the screen hides them.
Can I mount a TV in a rented home?
Ask your landlord first and get the answer in writing. Many allow it if you repair the wall when you leave. If drilling is not allowed, a floor-standing TV stand with a mount pole gives a similar look with no holes.
Do I need a hammer drill for a concrete wall?
Yes. A standard drill will struggle in concrete and may burn out. A hammer drill with a masonry bit cuts cleanly and lets you set the anchor at the right depth.
What if my TV has a curved back or recessed holes?
Use the spacers included in your mount kit. They build out the bracket so it sits flat against the panel. If the supplied spacers are too short, buy a VESA adapter plate rather than longer screws.
Can one person mount a TV alone?
Only with a small, light screen under about 32 inches. For anything larger, the lifting and aligning steps need a second pair of hands. Trying it alone risks damaging the TV and injuring yourself.