
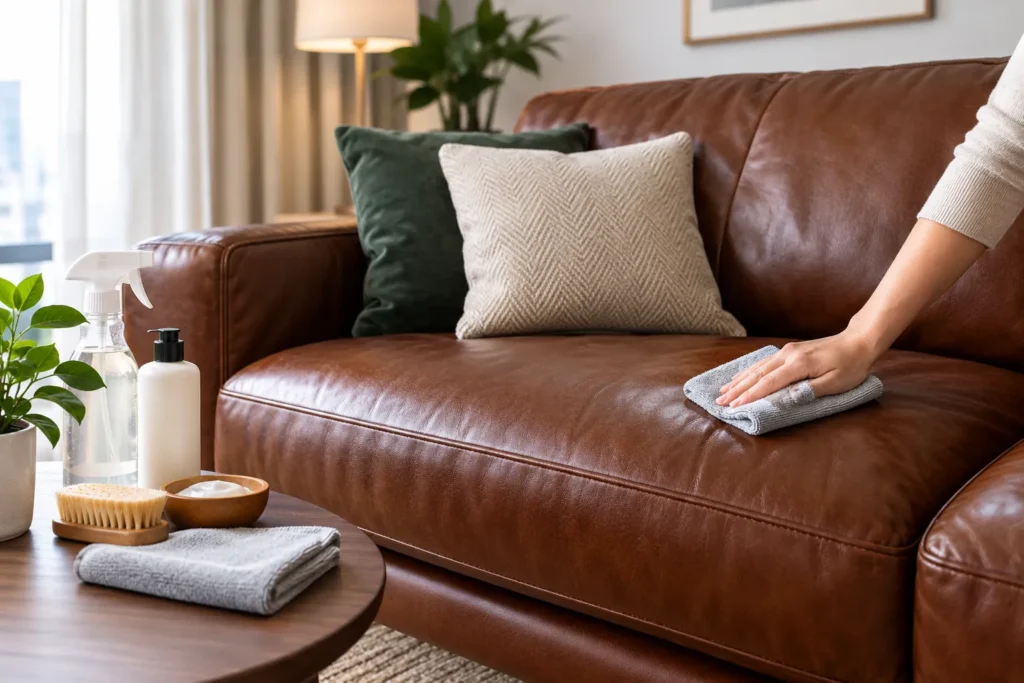
A leather sofa can look good for decades, but only if you clean it the right way. Leather is skin, not fabric, so it reacts differently to water, soap, and heat than the upholstery you might be used to caring for. Use the wrong product, scrub too hard, or soak it with water, and you can leave marks that never fully go away.
This guide by Homes Remedy Team covers the safest ways to clean a leather sofa or couch at home, which cleaners actually work for each leather type, how to handle common stains, and when a problem is better left to a professional.
What is the safest way to clean a leather sofa?
Vacuum away loose dirt first, wipe the surface with a barely damp microfiber cloth and a small amount of mild soap, then dry it right away with a clean cloth. Always test any product on a hidden spot first, and confirm your leather type before using anything stronger than water and soap.
Understanding Your Leather Before Cleaning
Before you clean anything, find out what kind of leather you own. Leather furniture is not all made the same way, and a cleaner that works well on one couch can strip the color or dry out another. Many pieces come with a care tag listing a cleaning code, or naming the leather type directly. If yours does not, look closely at the surface, or check with the manufacturer.
Aniline Leather
Aniline leather is dyed all the way through with soluble dyes and has no protective coating on top. It keeps the natural grain, small scars, and markings of the original hide, which is why it looks and feels so rich. This also makes it the most absorbent type. It stains easily and darkens with body oils over time, so it needs the gentlest cleaning of all leather types.
Semi-Aniline Leather
Semi-aniline leather starts out the same way as aniline leather but gets a very light protective topcoat. This gives it a bit more resistance to spills and fading while it keeps most of the natural texture. It can handle slightly more frequent cleaning than pure aniline leather, but it is still more delicate than fully protected leather.
Protected or Pigmented Leather
Protected leather, sometimes called pigmented leather, has a polymer coating with color pigments on the surface. This coating makes it far more resistant to stains and everyday wear, which is why it shows up so often in family homes. It can handle mild soap and water cleaning more regularly than aniline leather can.
Faux or Synthetic Leather
Faux leather, also called synthetic or vegan leather, is not animal hide at all. It is usually a fabric backing coated in polyurethane or PVC. It holds up well to regular wiping and mild cleaners, but it can crack or peel if it dries out, and strong solvents can dissolve its coating.
| Leather Type | How to Identify It | Cleaning Approach |
| Aniline | Soft feel, visible natural grain, darkens where touched often | Clean lightly, avoid soaking, condition regularly |
| Semi-aniline | Slight sheen, natural texture, resists light spills better | Mild soap and water usually fine, test first |
| Protected or pigmented | Uniform color, smooth or lightly textured surface | Handles regular cleaning well, still test new products |
| Faux or synthetic | Very even surface and stitching, plastic-like feel | Wipe with mild soap, avoid strong solvents and high heat |
Identifying leather type matters because the wrong cleaner on the wrong leather can lift dye, leave water spots that never fade evenly, or strip the finish entirely. When in doubt, treat your furniture as delicate until you confirm otherwise.
Before You Clean Your Leather Furniture
What should you do before cleaning leather furniture?
Check the manufacturer’s care tag for a cleaning code, test any product on a hidden area, remove loose dust with a vacuum, and gather soft, clean tools before you start.
- Check manufacturer instructions. Many leather sofas come with a care tag listing an official cleaning code.
- Look for the cleaning code. W means a water based cleaner is safe. S means only a solvent based cleaner should be used. W or S means either works. X means vacuum only, with no liquid cleaners at all.
- Test in an inconspicuous spot. Try any product on the underside of a cushion or the back of the sofa first, and wait a few minutes to see if it changes the color or texture.
- Remove loose dust and debris. Wipe the surface with a dry microfiber cloth, then vacuum the seams, folds, and crevices with a soft brush attachment. Dust and grit act like sandpaper if you rub them into the leather while cleaning.
- Gather the right tools. You will want several clean microfiber cloths, a soft brush vacuum attachment, mild soap or a leather specific cleaner, and a leather conditioner.
8 Best Ways to Clean Leather Furniture
There is no single method that works for every leather couch or every type of dirt. These eight methods cover routine dusting, deeper cleaning, and specific problems. Pick the one that matches your situation, and always start with the gentlest option first.
1. Dry Dusting and Vacuuming
When to use it: Weekly or biweekly maintenance on any leather type.
What you need: A dry microfiber cloth and a vacuum with a soft brush attachment.
Steps:
- Wipe the entire surface with a dry microfiber cloth to lift surface dust.
- Vacuum the seams, tufts, and crevices with the soft brush attachment on low suction.
- Wipe once more with a clean cloth to catch anything left behind.
Precautions: Use a soft brush, never a stiff one, since bristles can scratch the surface.
When not to use it: This will not remove oily stains or sticky residue. Move to a wet cleaning method for those.
2. Mild Soap and Water Solution
When to use it: General grime, light stains, and everyday body oil buildup.
What you need: A bowl of warm water, a few drops of mild, unscented soap, and two clean microfiber cloths.
Steps:
- Mix a small amount of soap into the water until it is barely sudsy.
- Dip a cloth in the solution and wring it out until it is only damp, not wet.
- Wipe in gentle circular motions, working in small sections.
- Use a second cloth, dampened with plain water, to wipe away soap residue.
- Dry the area right away with a dry towel.
Precautions: Never let water pool on the leather or seep into the seams, since trapped moisture can lead to mold or a stiff, water marked finish.
When not to use it: Skip this method on aniline leather until you have tested it, since aniline leather absorbs water quickly.
3. Dedicated Leather Cleaner
When to use it: Deeper cleaning, or when soap and water is not cutting through the grime.
What you need: A leather cleaner made for your specific leather type, plus a soft cloth or the applicator that comes with the product.
Steps:
- Read the label and confirm it matches your leather type.
- Apply a small amount to a cloth, not directly onto the furniture.
- Work it in using gentle, circular motions.
- Wipe away residue with a clean, dry cloth.
Precautions: Follow the product’s drying time, and do not apply conditioner until the cleaner has fully dried.
When not to use it: Avoid all purpose or multi surface cleaners that are not labeled for leather, since these often strip natural oils from the hide.
4. Leather Cleaning Wipes
When to use it: Quick spot cleaning between deeper cleaning sessions.
What you need: Pre moistened wipes formulated specifically for leather.
Steps:
- Wipe the affected area gently.
- Let the surface air dry for a few minutes before sitting on it.
Precautions: Check that the wipes are formulated for leather, not general household surfaces.
When not to use it: These are meant for small, everyday marks, not heavy staining or years of buildup.
5. Distilled Water Rinse
When to use it: After a soap solution, to remove any leftover residue.
What you need: Distilled water and a clean microfiber cloth.
Steps:
- Dampen a cloth with distilled water only.
- Wipe over the cleaned area to lift any soap film.
- Dry immediately with a separate towel.
Precautions: Use distilled water rather than tap water where possible, since minerals in tap water can leave faint marks on some finishes.
When not to use it: Not needed for quick dusting or wipe downs that did not involve soap.
6. Baking Soda for Grease and Oil
When to use it: Fresh grease or oil spots, before they set into the leather.
What you need: Baking soda and a soft, dry cloth.
Steps:
- Sprinkle a light layer of baking soda over the spot.
- Let it sit for several hours, or overnight for stubborn spots, so it can absorb the oil.
- Brush or wipe away the powder with a dry cloth.
Precautions: Do not rub the powder in, since friction can push oil deeper into the leather. Test on a hidden area first, since baking soda is not universally safe on every finish and can dull some pigmented leathers if left too long.
When not to use it: Avoid this on aniline or unfinished leather without testing, since its absorbency can pull the treatment in unevenly.
7. pH Balanced Cleaner for Pale and White Leather
When to use it: Light colored or white leather, where color transfer and yellowing show up fast.
What you need: A pH balanced leather cleaner made for pale leather, plus a soft white cloth.
Steps:
- Apply the cleaner to the cloth, not the furniture.
- Wipe gently in one direction rather than scrubbing back and forth.
- Use a clean section of cloth for each new area to avoid spreading transferred color.
Precautions: Avoid colored cloths, since dye from the cloth itself can transfer onto pale leather.
When not to use it: Skip harsh whitening agents or bleach based products entirely, since they break down the leather’s finish and can cause permanent discoloration.
8. Professional Grade Leather Cleaning Kit
When to use it: High value aniline or semi-aniline furniture, or leather that has not been cleaned in a long time.
What you need: A complete leather care kit with a cleaner and matching conditioner, usually sold as a set.
Steps:
- Follow the kit’s instructions exactly, since formulas vary by brand.
- Clean one section at a time rather than the whole piece at once.
- Allow full drying time between the cleaning and conditioning steps.
Precautions: These kits are formulated to work together, so mixing products from different brands can lead to uneven results.
When not to use it: If the furniture is antique, extremely fragile, or already damaged, a professional cleaner is a safer choice than a DIY kit.
Best Cleaners for Leather Sofas and Couches
Rather than chasing a specific brand name, focus on picking the right category of product for your furniture.
Leather Specific Cleaners
These are formulated to lift dirt without stripping the natural oils that keep leather flexible. Look for one labeled for your exact leather type, whether that is aniline, semi-aniline, or protected leather.
Cleaning Wipes
Convenient for quick touch ups, but not a substitute for a full cleaning. Best used between deeper cleaning sessions.
Leather Cleaning Kits
These usually pair a cleaner with a matching conditioner. Because the two products are designed to work together, they tend to give more consistent results than mixing separate brands.
DIY Solutions
Homemade mixtures, including vinegar and water or oil and vinegar blends, show up often in cleaning advice. These are not automatically safe for every type of leather. Vinegar is acidic and can dry out or discolor some finishes, especially aniline leather, so any DIY mixture should be tested on a hidden spot first and used sparingly, if at all, on delicate leather.
Leather Conditioners
Conditioners restore moisture after cleaning. Look for one free of silicone and heavy wax, since these can leave a sticky film or attract more dirt over time.
What to look for when choosing a product:
- A label that names your specific leather type
- No bleach, ammonia, or strong solvents in the ingredient list
- A pH balanced formula, especially for pale or white leather
- A small enough bottle to test before committing to a full size purchase
How to Remove Common Stains From Leather
How do you get stains out of a leather couch?
Blot the stain immediately with a dry cloth, then treat it based on what caused it. Grease needs an absorbent powder, water based stains need a barely damp cloth, and anything set in, discolored, or unidentified is safer left to a professional.
| Stain | At Home Method | When to Call a Professional |
| Coffee or food | Blot immediately, then wipe with a barely damp cloth and mild soap | If it has dried and darkened the leather |
| Grease or oil | Sprinkle baking soda or cornstarch, let sit for hours, then brush away | If oil has soaked in deeply or left a dark ring |
| Ink | Dab gently with a cotton swab and a small amount of rubbing alcohol, after testing first | On aniline or unfinished leather, since alcohol can affect the dye |
| Mud | Let it dry fully, then brush it off before wiping with a damp cloth | Rarely needed unless the dye itself is stained |
| Pet accidents | Blot up liquid, then clean with a leather safe cleaner | If odor remains after cleaning, or the leather has darkened |
| Water marks | Lightly dampen the whole panel evenly so the mark blends in, then dry fully | If the mark does not fade after a few attempts |
| Dye transfer | Wipe promptly with a barely damp cloth | If the transfer has set in, especially on light colored leather |
Some of these situations can be handled safely at home, especially when you catch the spill early. Set in stains, dye transfer on pale leather, and marks on valuable aniline leather carry more risk, and a professional cleaner has tools and products that go beyond typical home remedies.
How to Clean a Leather Sofa Step by Step
What is the full process for cleaning a leather sofa?
Vacuum first, test your cleaner, wipe the whole surface section by section, dry it fully, then condition once it is completely dry.
- Remove cushions if possible and vacuum every surface, including seams and crevices, with a soft brush attachment.
- Check the care tag for a cleaning code and confirm what type of leather you have.
- Test your chosen cleaner on a hidden spot, like the underside of a cushion, and wait a few minutes.
- Mix a mild soap solution or prepare your leather cleaner, then dampen a microfiber cloth and wring out the excess.
- Wipe the sofa in small sections, using gentle circular motions.
- Wipe each section again with a cloth dampened in plain water to remove soap residue.
- Dry each section immediately with a dry towel before moving to the next.
- Let the entire piece air dry fully, away from direct sunlight or heat vents.
- Once dry, apply a leather conditioner with a soft cloth, following the product’s instructions.
- Buff away any excess conditioner with a clean, dry cloth.
What Not to Use on Leather Furniture
Certain products and habits cause more damage to leather than the dirt they are meant to remove.
| Do | Don’t |
| Use mild soap and water, sparingly | Use bleach or ammonia based cleaners |
| Test new products on a hidden spot | Scrub with abrasive sponges or brushes |
| Blot spills immediately | Soak the leather or let water pool |
| Use a leather specific cleaner and conditioner | Use strong solvents like acetone or nail polish remover |
| Dry leather fully before conditioning | Rely on unverified DIY mixtures for valuable or aniline leather |
Bleach and harsh detergents strip the dyes and natural oils out of leather, leaving it dry, faded, and prone to cracking.
Abrasive scrubbers create tiny scratches in the surface that trap dirt and become more visible over time.
Excessive water can seep into the stitching and padding underneath, leading to mold, mildew, or a stiffened, warped finish.
Strong solvents dissolve the protective topcoat on pigmented leather and can strip color from aniline leather entirely.
Unverified DIY mixtures, including full strength vinegar or alcohol, might work on one type of leather and damage another, so they should never be treated as universally safe.
Cleaning vs Conditioning Leather
What is the difference between cleaning and conditioning leather?
Cleaning removes dirt, oil, and grime from the surface. Conditioning replaces the natural moisture leather loses over time. They solve two different problems, and one cannot replace the other.
Cleaning alone leaves leather looking fresh, but repeated cleaning without conditioning can gradually dry out the hide, since even mild soap removes some natural oils along with the dirt. Conditioning without ever cleaning just traps grime and oil under a fresh coat of product. For leather to stay soft and free of cracks over the years, it needs both steps done in the right order, cleaning first, then conditioning once the surface is completely dry.
How Often Should You Clean Leather Furniture?
How often should leather furniture be cleaned?
Dust weekly, wipe down with a mild cleaner every two to four weeks, and condition once every six to twelve months, adjusting based on how much the furniture is used.
| Household Situation | Suggested Frequency |
| Light use, no kids or pets | Dust weekly, deep clean every one to two months, condition once a year |
| Family home with children | Dust weekly, deep clean every two to three weeks, condition every six months |
| Homes with pets | Dust weekly, deep clean every two weeks, condition every six months |
| Furniture near a window or heat source | Same as above, plus condition more often since sunlight and dry heat pull moisture out faster |
| Frequent spills or heavy daily use | Spot clean as needed, deep clean every two weeks, condition every four to six months |
Leather Furniture Maintenance Tips
- Keep leather furniture out of direct sunlight, since UV rays fade color and dry out the surface over time.
- Keep it away from heating vents, radiators, and fireplaces, since dry heat pulls moisture from the hide.
- Rotate cushions occasionally so wear spreads evenly instead of concentrating in one spot.
- Wipe up spills the moment they happen rather than letting them sit.
- Avoid sitting on leather furniture in rough denim or with sharp objects in your pockets, since these can scuff or scratch the surface.
- Vacuum weekly to stop dust and grit from grinding into the finish.
When Should You Hire a Professional?
When is it safer to call a professional leather cleaner?
Call a professional for antique or high value leather, deep or set in stains, mold or mildew, torn or peeling leather, or any time you are unsure what type of leather you have.
- The leather is antique, inherited, or otherwise difficult to replace.
- A stain has set in for days or weeks and home methods have not helped.
- You notice mold, mildew, or a musty smell that does not go away with airing out.
- The surface is cracking, peeling, or the color looks uneven after a DIY attempt.
- You are not sure what type of leather you have and do not want to risk testing a cleaner yourself.
Frequently Asked Questions
Can I use baby wipes on leather furniture?
Most baby wipes are not formulated for leather and can leave a residue or affect the finish over time. A leather specific wipe is a safer choice.
Is vinegar safe for cleaning leather?
Vinegar is acidic and can dry out or discolor certain leather finishes, especially aniline leather. If you choose to use a diluted vinegar solution, test it on a hidden spot first and use it sparingly.
How do I clean white leather furniture without turning it yellow?
Use a pH balanced cleaner made for pale leather, avoid colored cloths that can transfer dye, and keep the piece out of direct sunlight, which can cause yellowing over time.
Can leather furniture get wet?
A small amount of moisture from a damp cloth is fine, but leather should never be soaked. Standing water can seep into the seams and padding, leading to stiffness, water marks, or mold.
How long does leather furniture last with proper care?
With regular dusting, gentle cleaning, and conditioning once or twice a year, quality leather furniture can last well beyond a decade, often developing a richer look with age.
Do I need to condition leather every time I clean it?
No. Cleaning can happen more often than conditioning. Most leather only needs conditioning once or twice a year, since overconditioning can leave the surface feeling sticky or greasy.
Final Thoughts
Leather furniture rewards the small amount of care it asks for. Dust it often, clean it gently, dry it fully, and condition it a couple of times a year, and it will keep looking better with age instead of wearing out. The moment you are unsure about a stain, a finish, or a cleaner, testing a hidden spot first, or calling in a professional, will always cost less than replacing the piece.